
Lessons I learned in Paris
Ahhh...Paris. Audrey Hepburn said “Paris is always a good idea”...and I couldn’t agree more! Which is why I chose that particular trip to talk about in this particular blog post. I’m getting antsy to travel again, so looking back at Paris photos made my heart happy. And who doesn’t want their heart to be happy??
All right, moving on to why we’re here. Looking back at your photos is one of the key ways to learn what is working and what isn’t. And even what is missing. I don’t mean the same day or even a few days after you take these photos...I mean a few months or even the next year.
Of course you’ll take a gander right after taking them - you’re dying to know how they turned out! But every so often it’s a good idea to go back to your previous trips with a critical eye (not too critical - I hear your inner demons getting a little too excited about this exercise). Why?
Because time removes some of the emotional attachment. Some but not all. Right after you take them, you remember all the details of the experience and setting up just the right shot. How it FELT while you were taking the shot. Where after a few months or so, some of those memories have faded. It gives you the chance to step back and say a bit more objectively “that’s a little underexposed...or that one is pretty darn good”.
To show you what I’m talking about, we’re going to take a little trip back to Paris. I’ll show you some of my photos that worked and some that didn’t. Some that I jumped through hoops of fire for, and how they actually turned out. Ready? Let's do this!
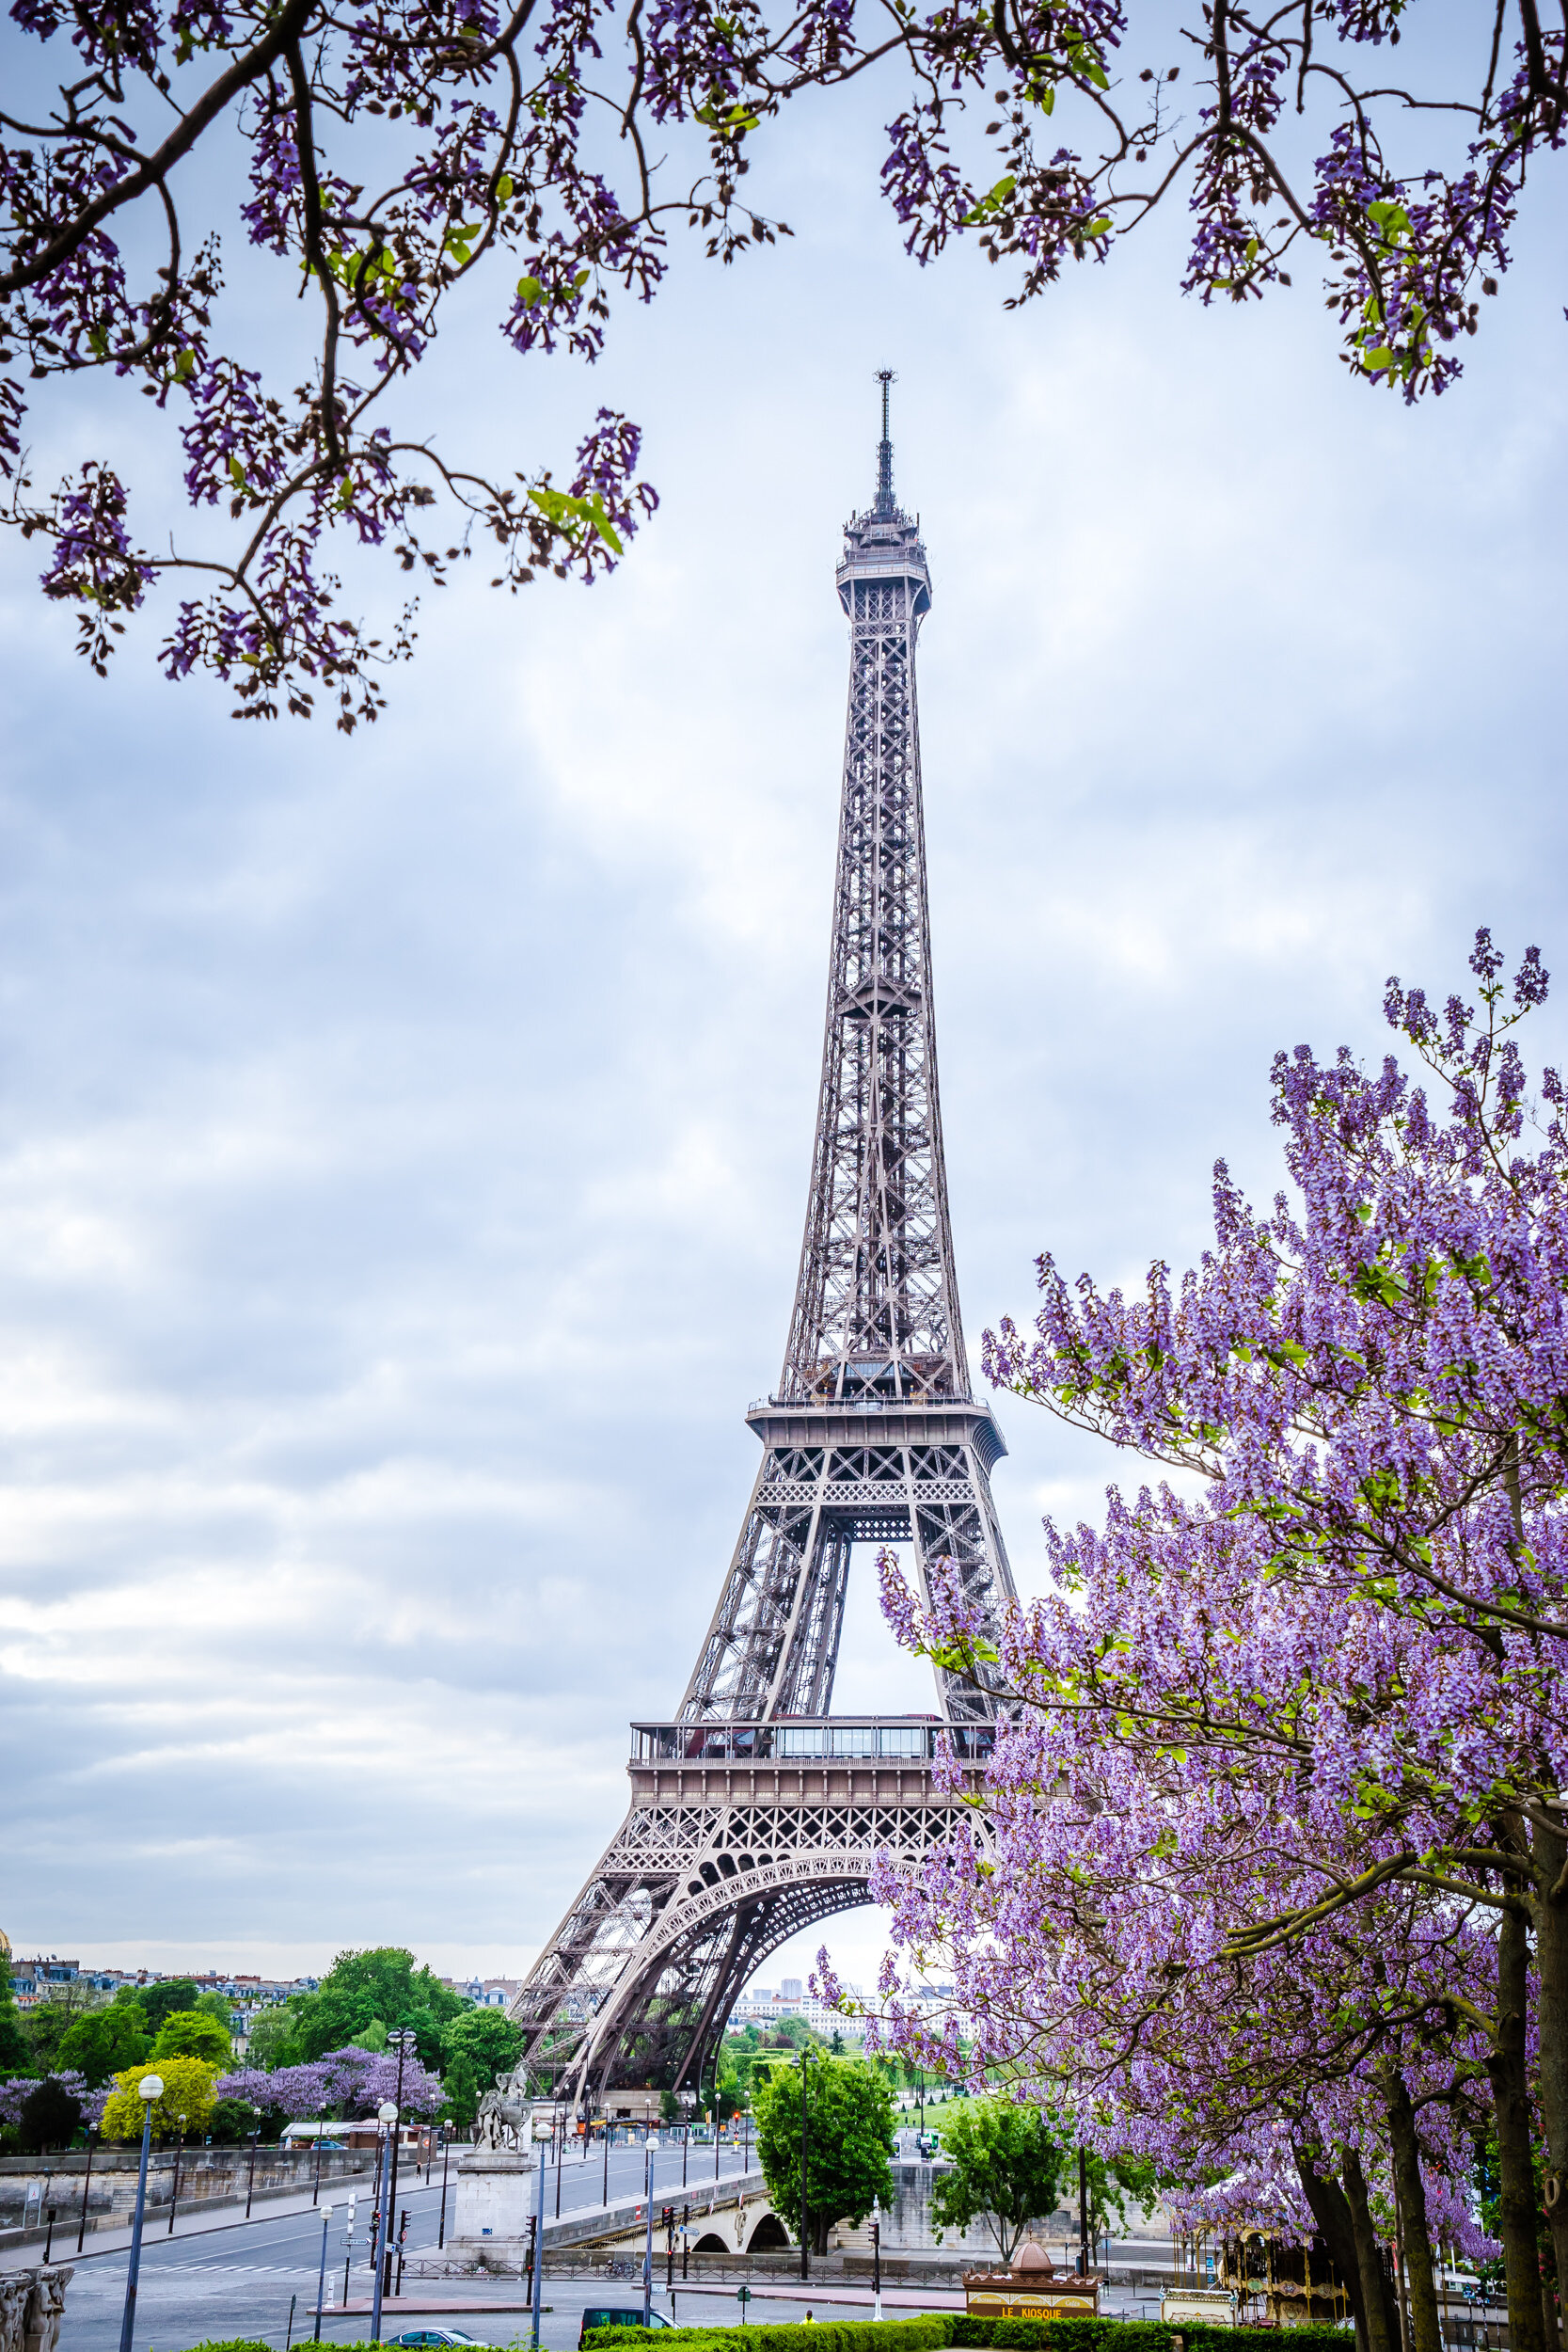
First of all, one of the techniques I try to implement in telling the story of a place I’m visiting, is to take different aspects, angles, perspectives. Some with a wider angle, an overall view...and some with more of the details.

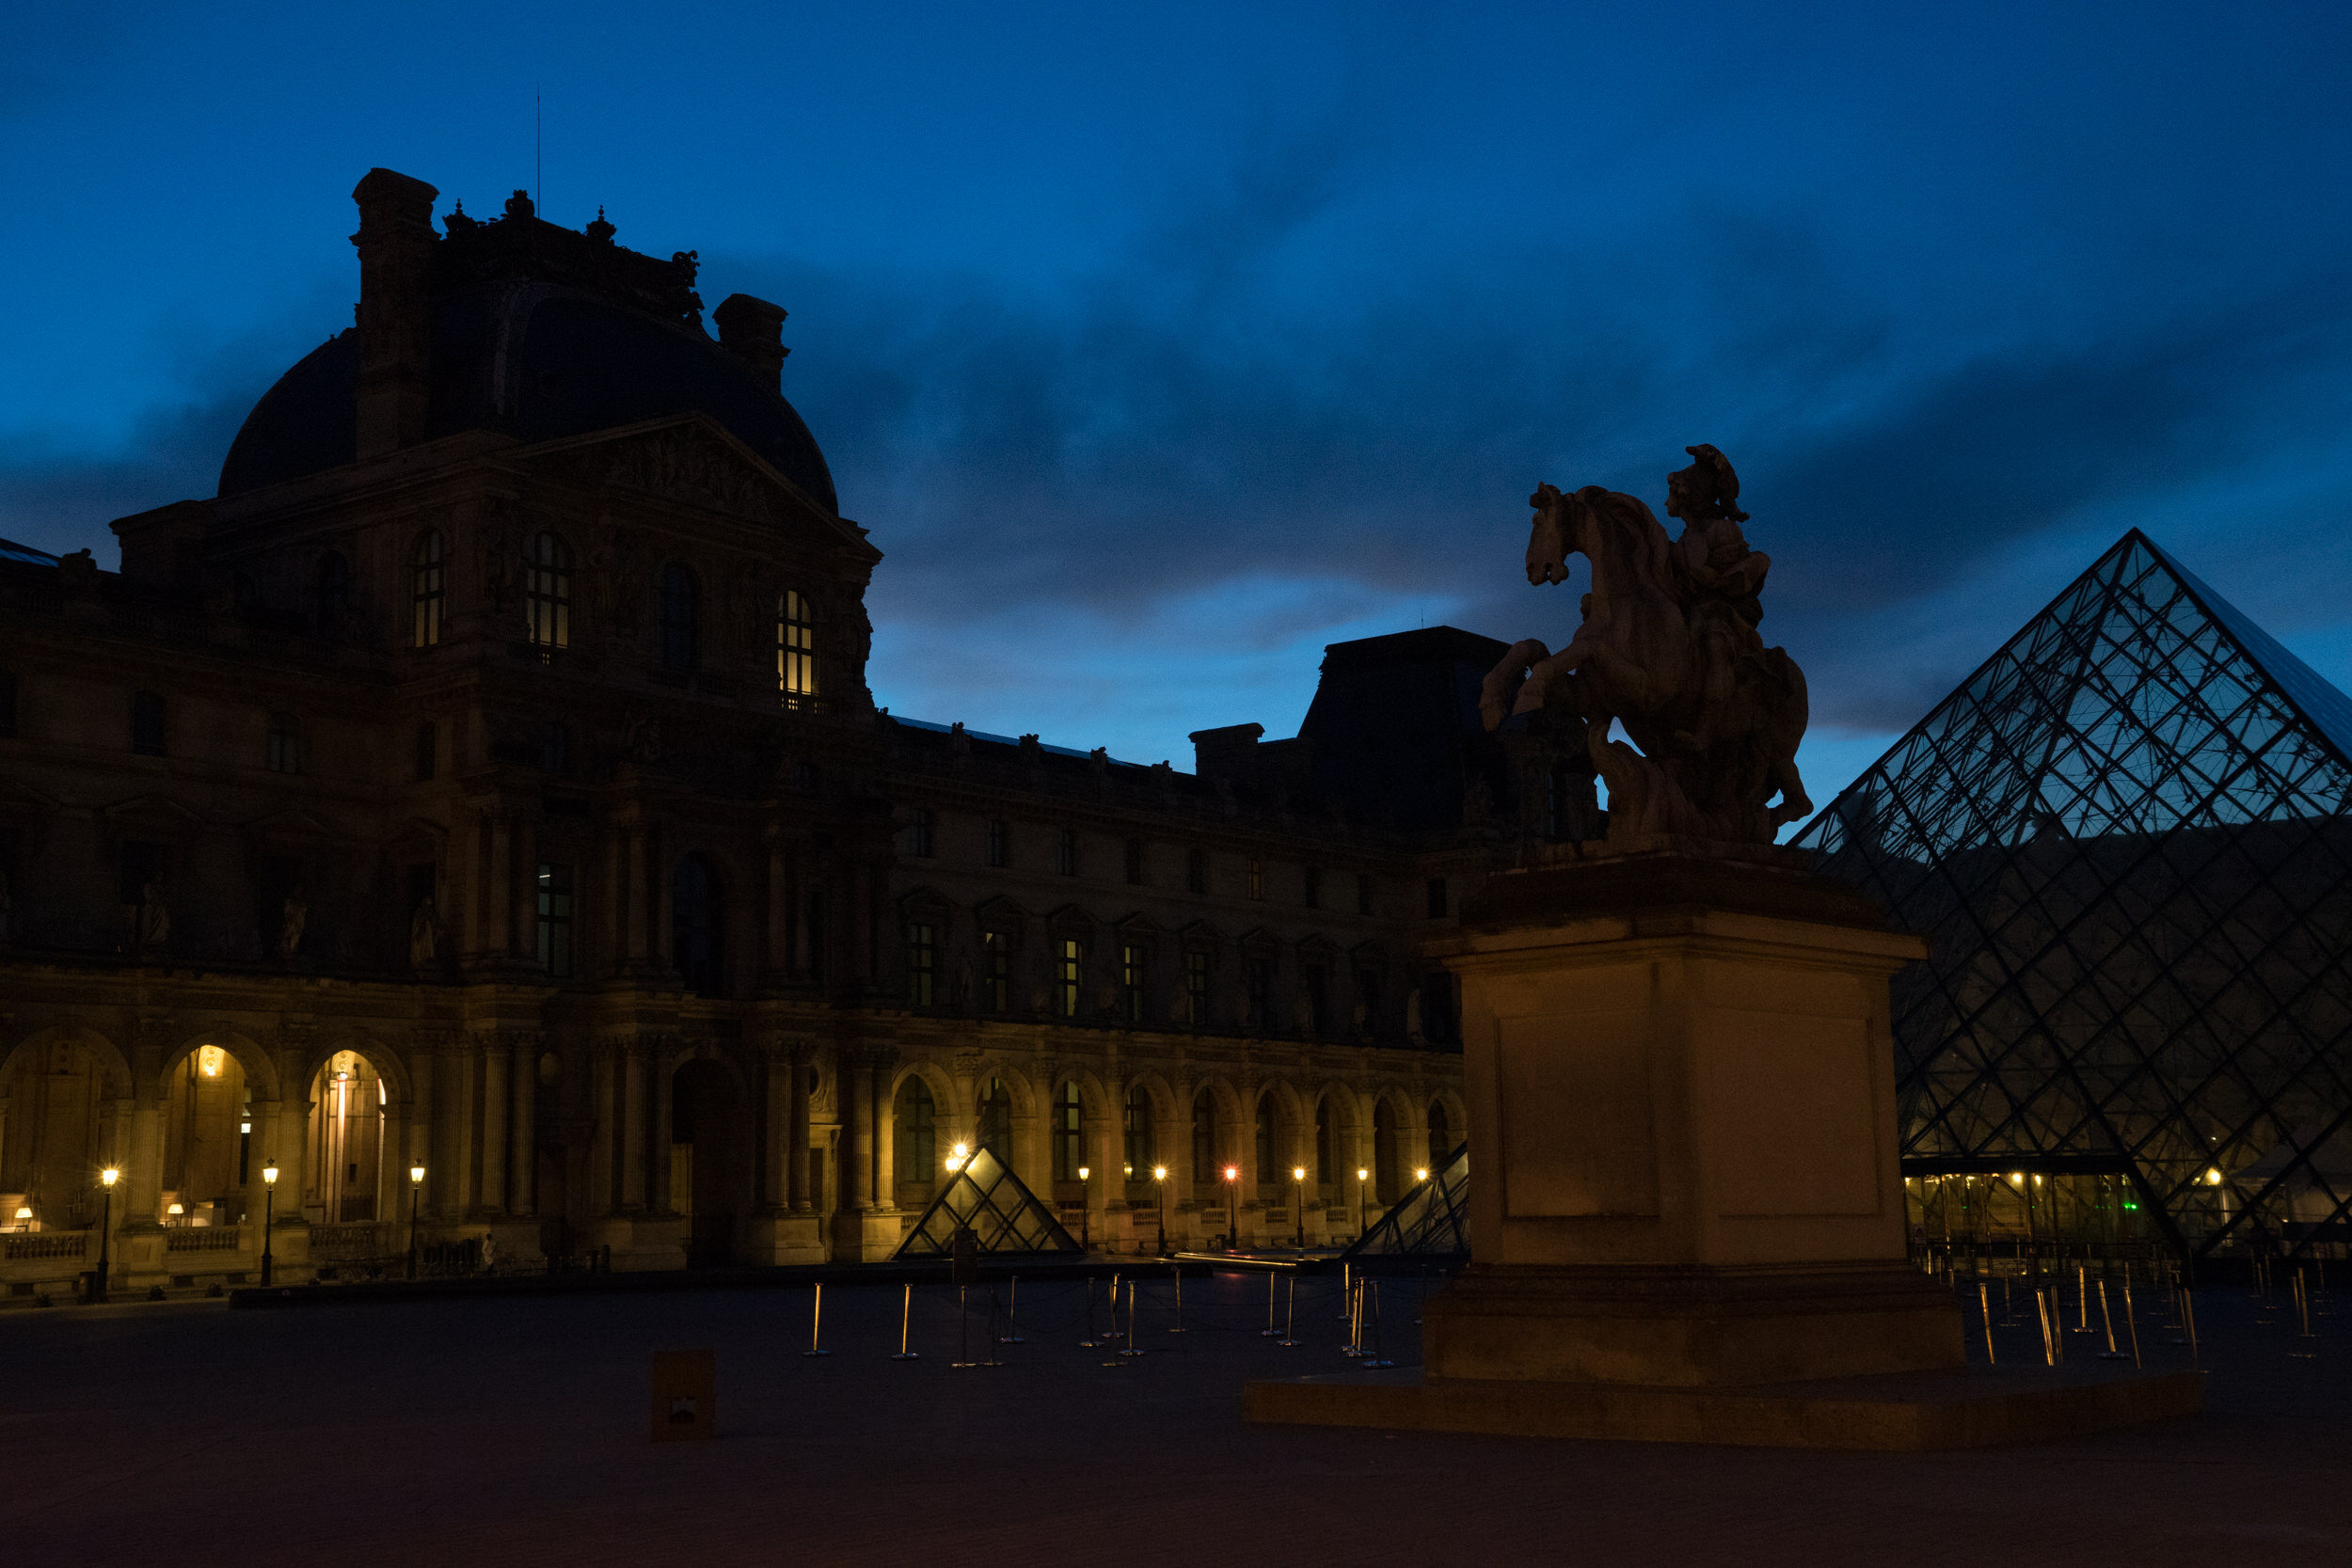
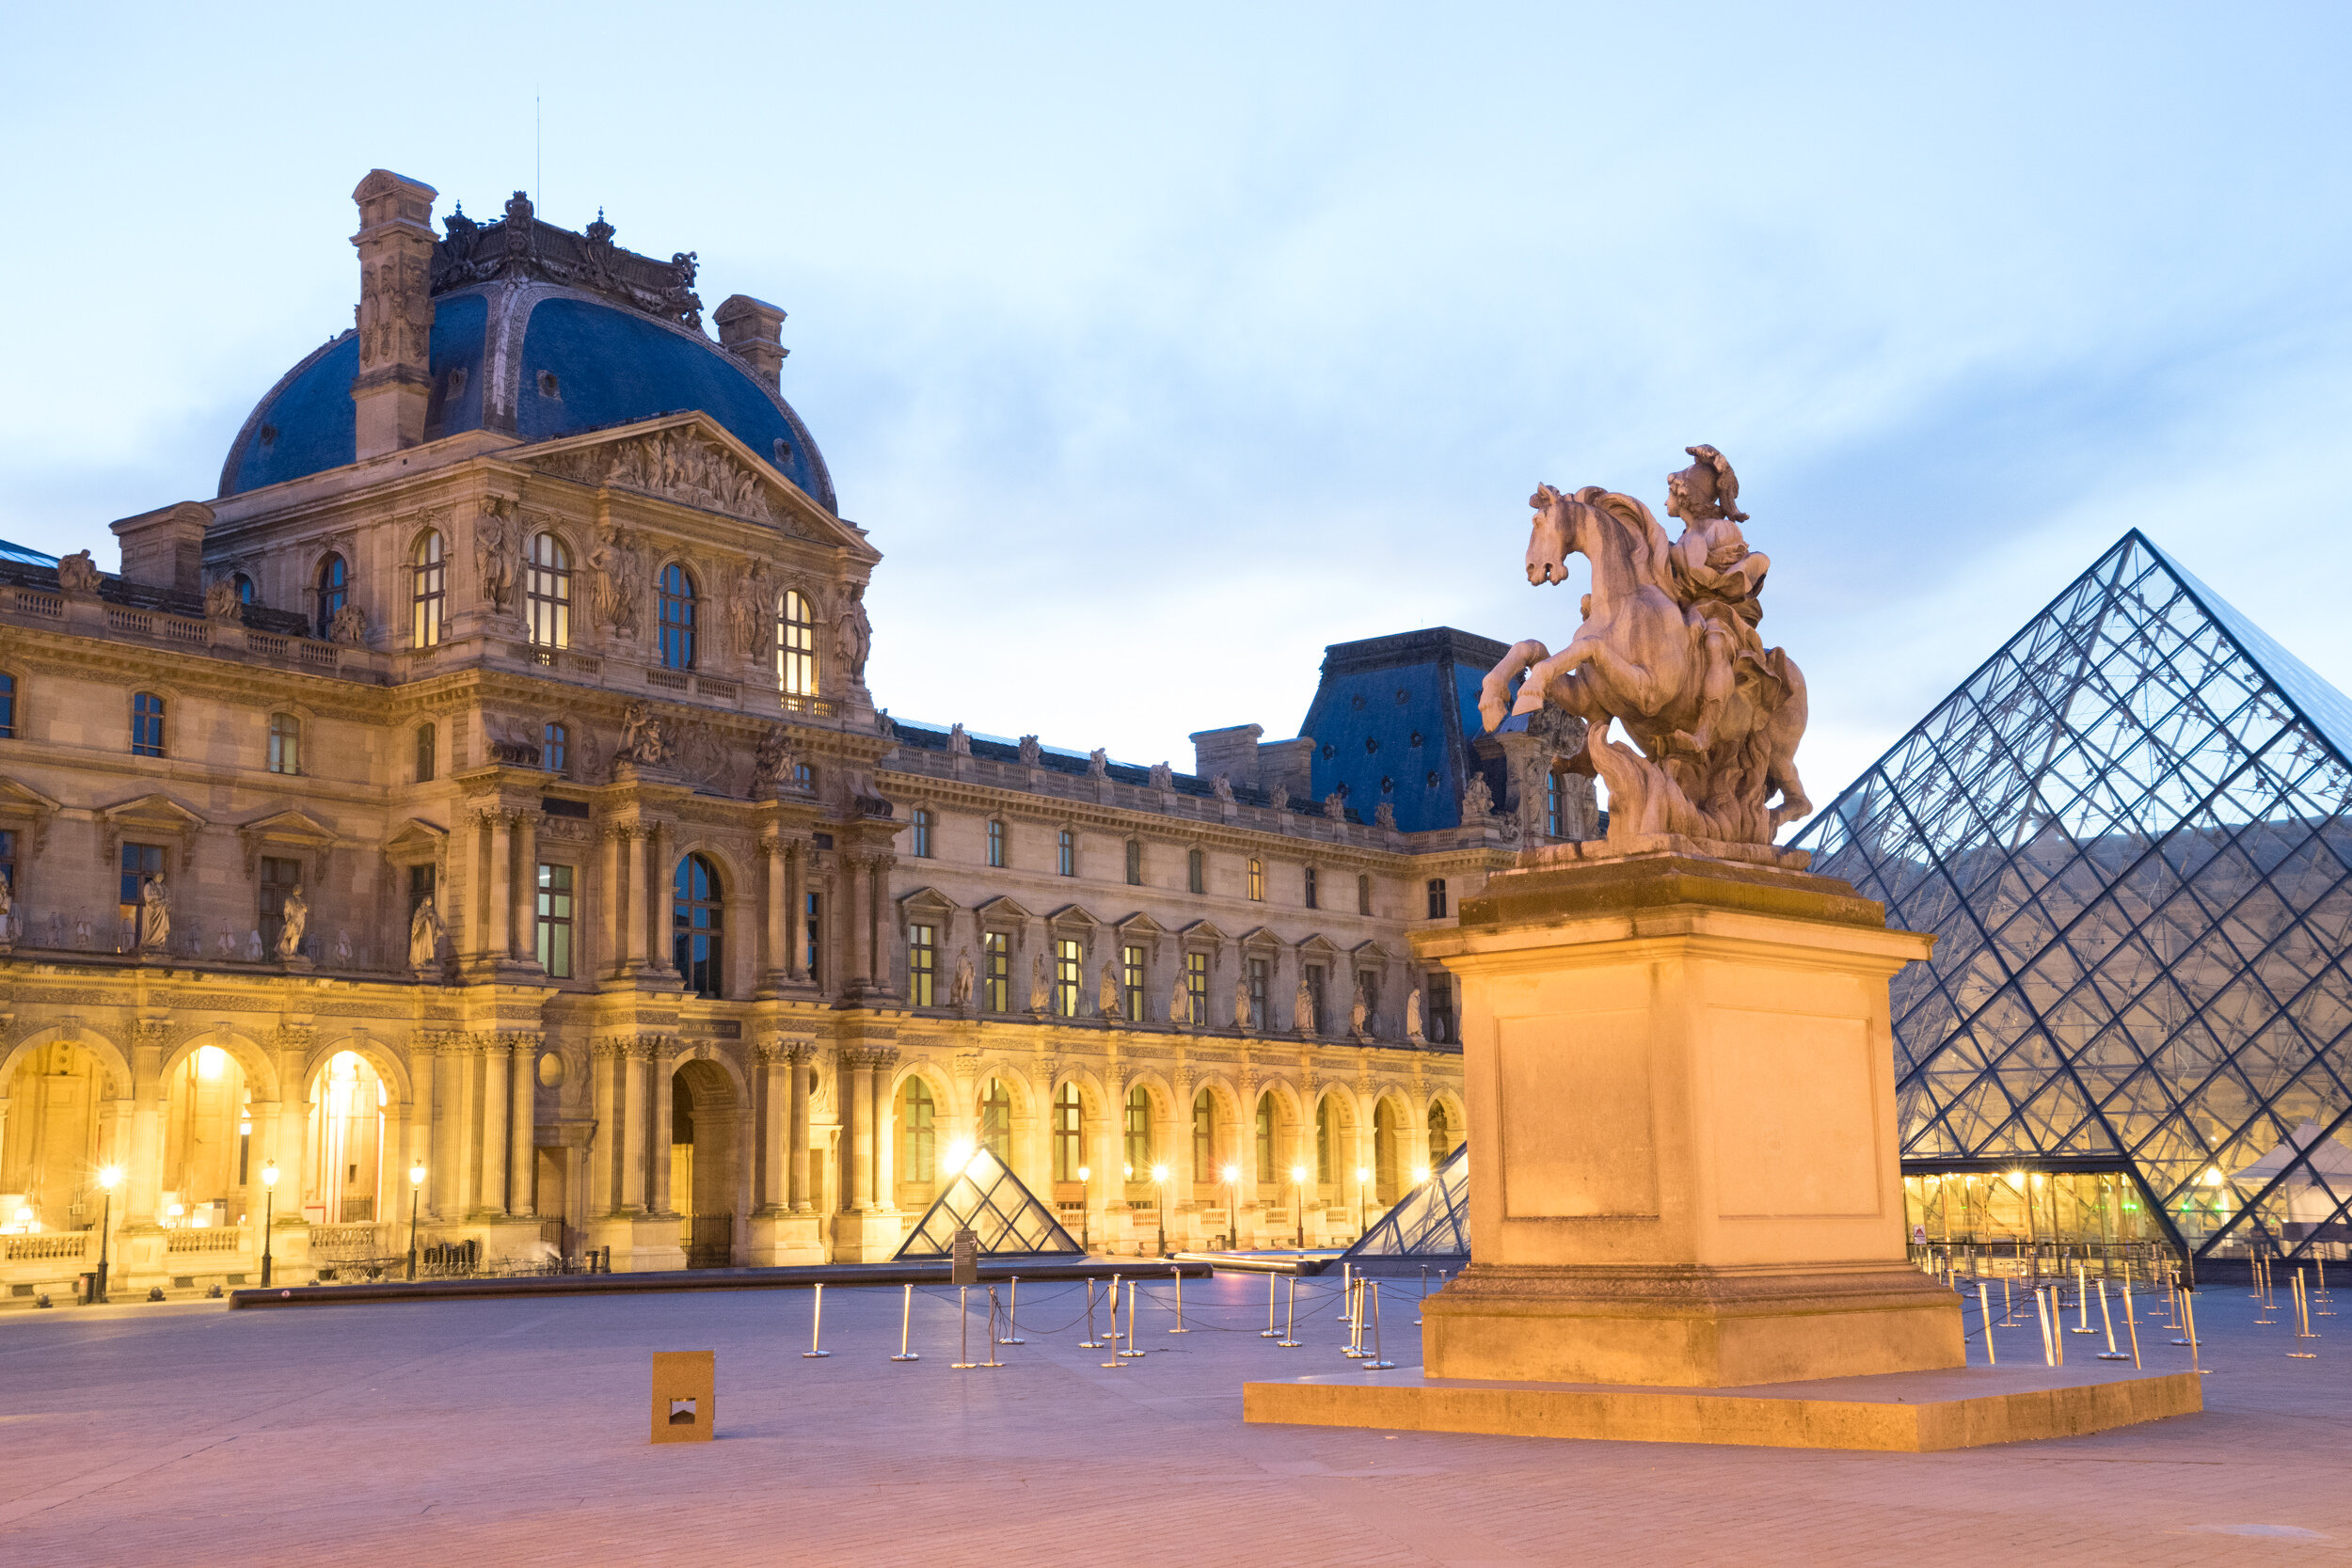
One of the wider angle, overview photos I made while in Paris
Now I’ll tell you, I’m much more of a detail person when it comes to photography. I LOVE to get in there close and really capture the little intricacies of...well anything. Markets, buildings, doors, the Metro… I have to remind myself to step back and look at the overall perspective - to give some context to all those details.
So when I look back at the whole series of photos from Paris, I would say one criticism I have is not enough wide-angle or overview kind of photos. And that’s one recommendation I have for you - look at the group of photos you have from a trip as a series. What is missing? Do you capture LOTS of wide-angle, overview shots but few details or vice versa? That means there are components missing from your story. That means that next time you travel, you’ll want to make a conscious effort to capture what was missing from that last trip.

One of the detail shots - and of course it’s of macarons. Mmmmm….
Now the other thing you’ll learn from looking back at your photos is that sometimes what you try works, and sometimes it just doesn’t. But it’s still important to try lots of different angles and perspectives...because it just MIGHT work!
When you arrive somewhere like Paris, it can be daunting. Where do you even start with all the magnificence? You start where you are. You take a breath, look around you and start to take it all in...and then lift your camera and start to create photos that capture what strikes you. And you make LOTS of photos.
So looking at them later, of course they didn’t all work. But the more you try, the more that will turn out. Wow you. Make you say “damn I’m good at this!” Take this photo of The Pont des Arts. I had a vision of the locks in the foreground and the Eiffel Tower in the background, using shallow depth of field but with the focus on the background rather than foreground. I will often try shallow depth of field, but with different focal points in the same scene - just to see which one works better. This one really didn’t. But I tried it! And that’s how you’ll increase your odds of getting more good photos. Keep trying different things.

For this one I was trying different aspects of shallow depth of field. I don’t love it, but I’ll never stop trying!
Now while we were in Paris, I wanted to capture some of that gorgeous “golden light”. So up at 4am and on the Metro we went (we being me and my sweet and patient hubby). We arrived at the Louvre right before sunrise only to find out it was roped off and we couldn't really get close enough to capture what I’d envisioned.
But I was there...and oh I was going to take some photos! And since the light at that hour is a little tricky, I used both a tripod and a technique called HDR. Which means you take a series of photos with different exposures (dark to light) and then combine them later in Lightroom to create a light-balanced photo. Yes it’s like magic.
So here is the example of darkest to lightest, and the final version.
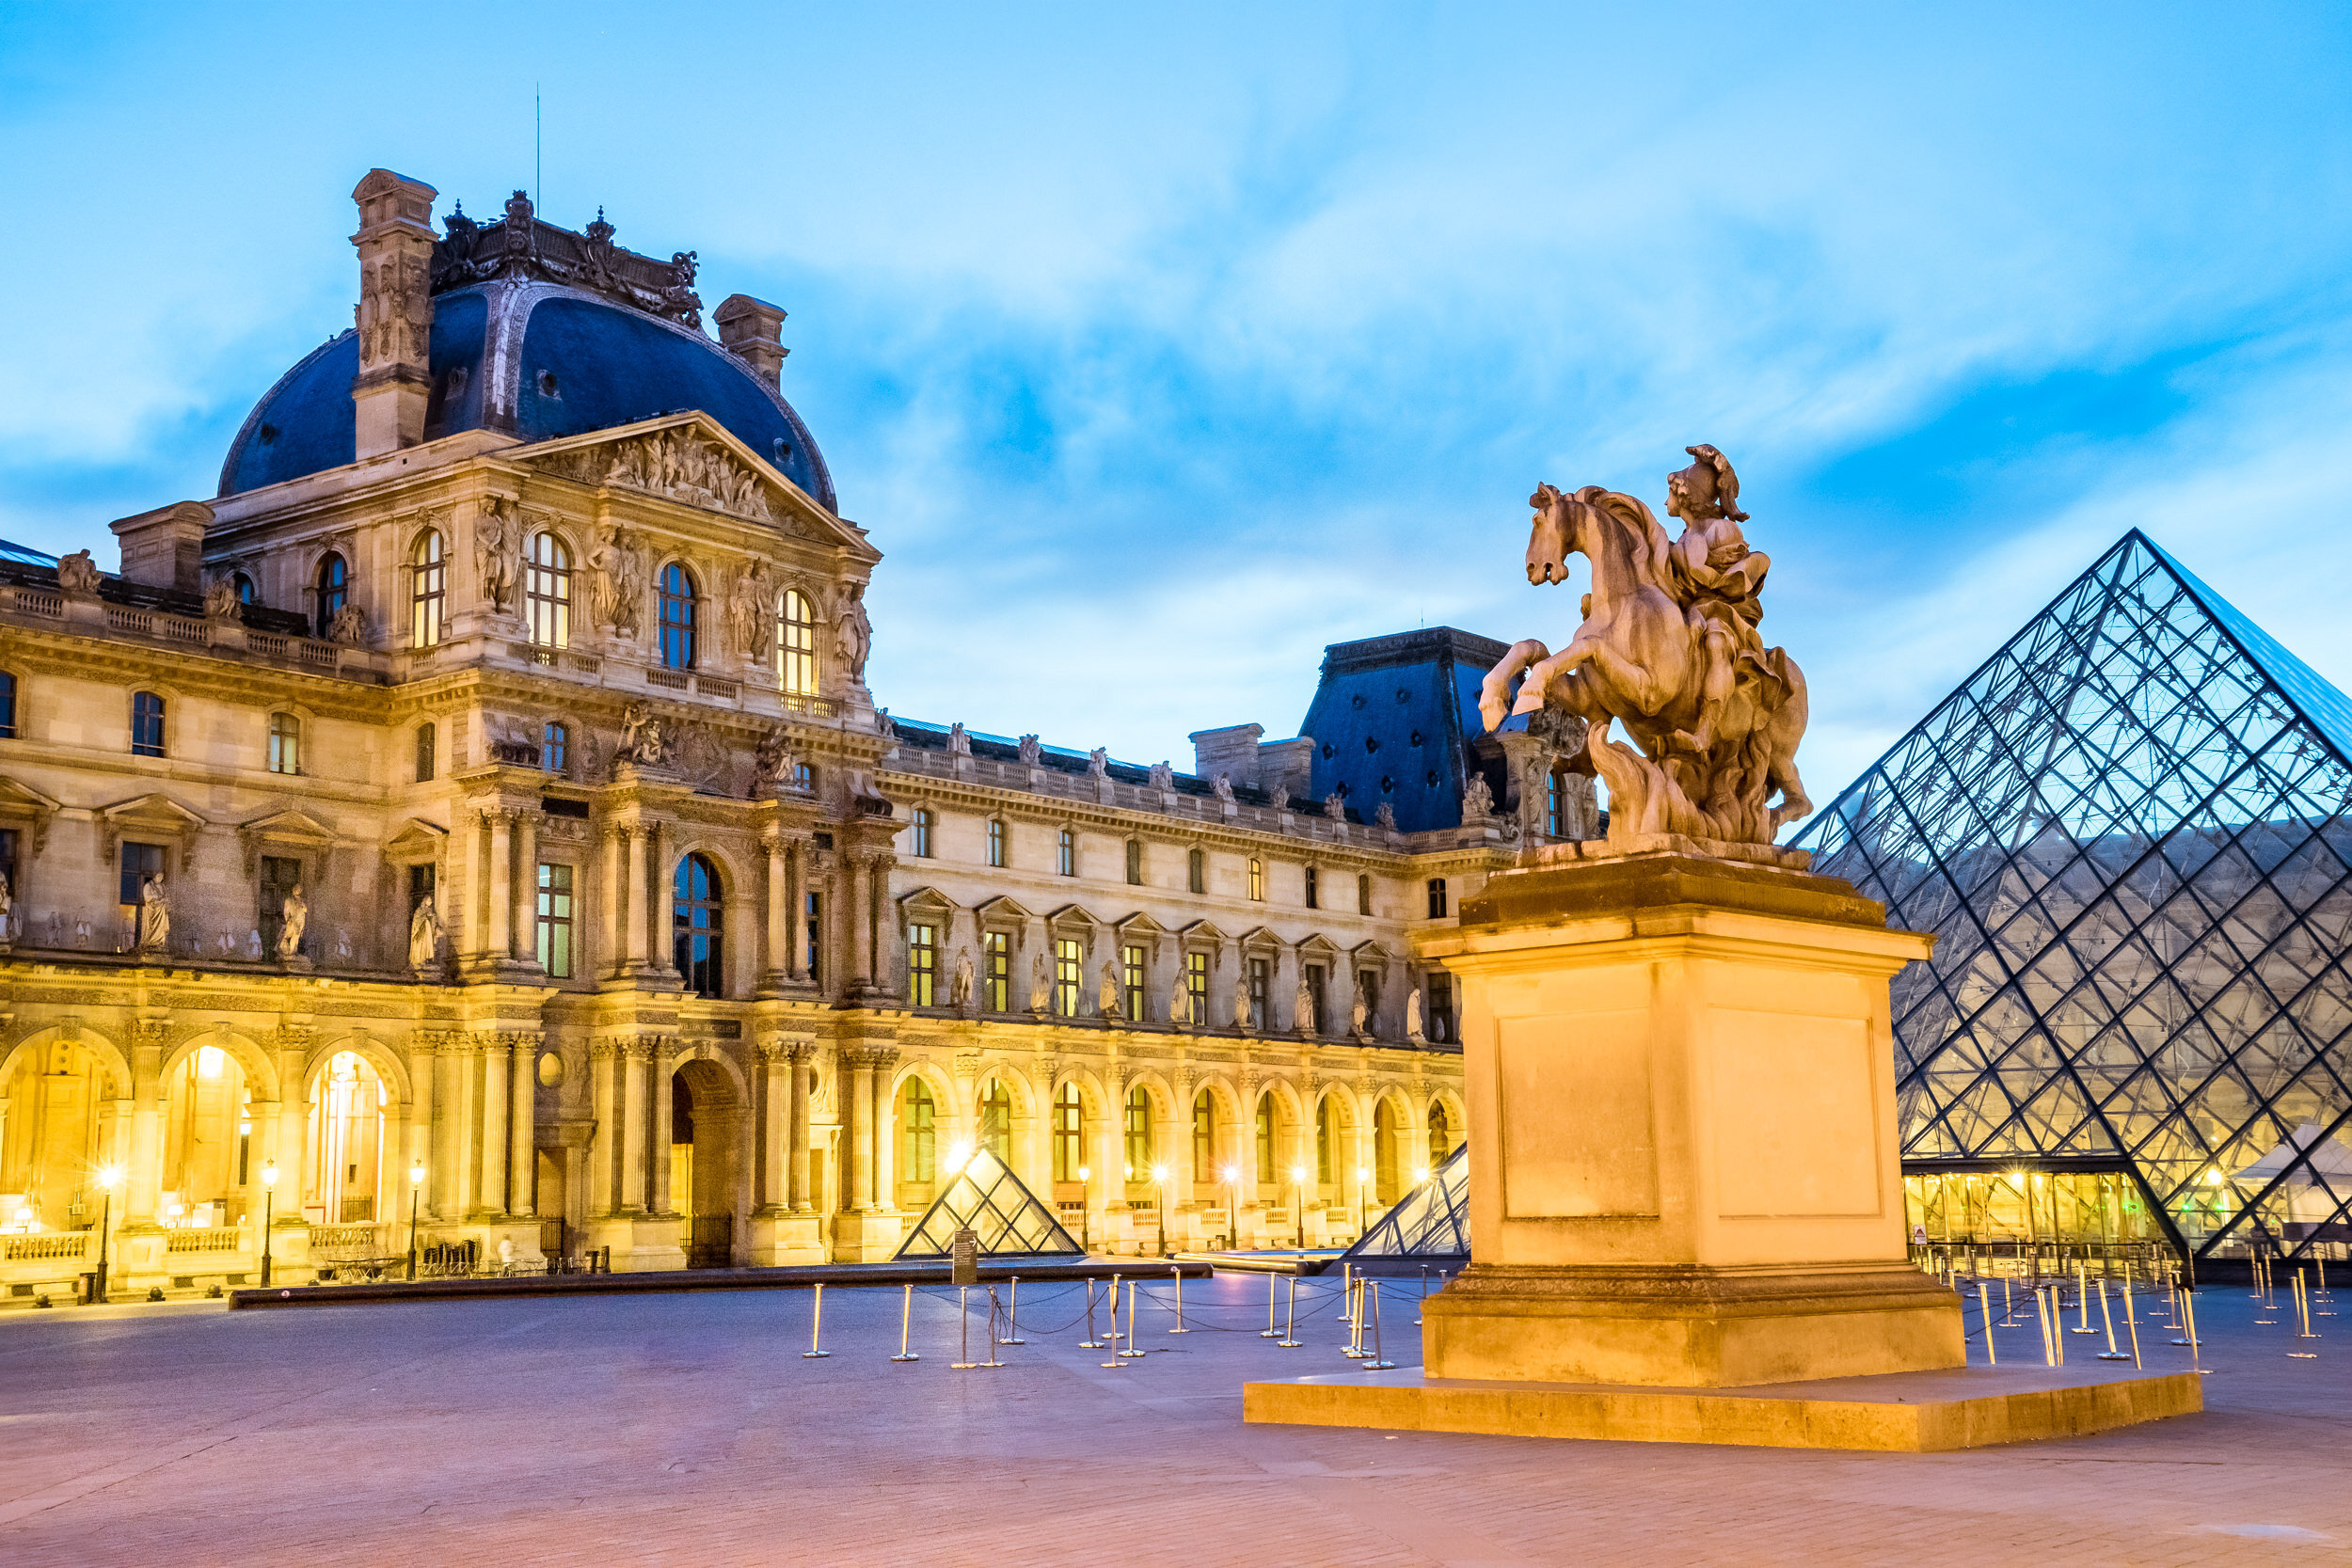
This is not something I do all that often, because honestly it’s a lot of work. And I’m generally more in the moment and capturing the reality rather than trying to set up for the perfect shot. But it was fun to try. So maybe that’s the lesson here - try new things even if they’re hard!
Now let’s talk about photographing people. I truly love to photograph people when I’m traveling, but I’m also a bit shy about it. To walk up to a stranger and ask permission is pretty intimidating to me. So I tend to sneak in a photo, and then feel like a stalker.
I gave that preface to the “photographing people'' lessons to give a little background. And now onto the lesson I learned. A couple really. 1) I don’t have enough of them (remember that shyness vs. stalker dilemma) and 2) when I do have them, there are often ugly distractions in the background. This usually happens because I didn’t want to stand there, camera ready, waiting for the white truck to move...as I didn’t want to bring any more attention to myself.
So I guess what I need to learn here is to either get more brave and strike up a conversation with people, or be more stealthy...and patient. I’d probably be better with the brave option, so I’ll work on that.

Even with a severe crop, the traffic is really distracting back there (yes especially that white van).

What’s UP with all the white vans, Paris?
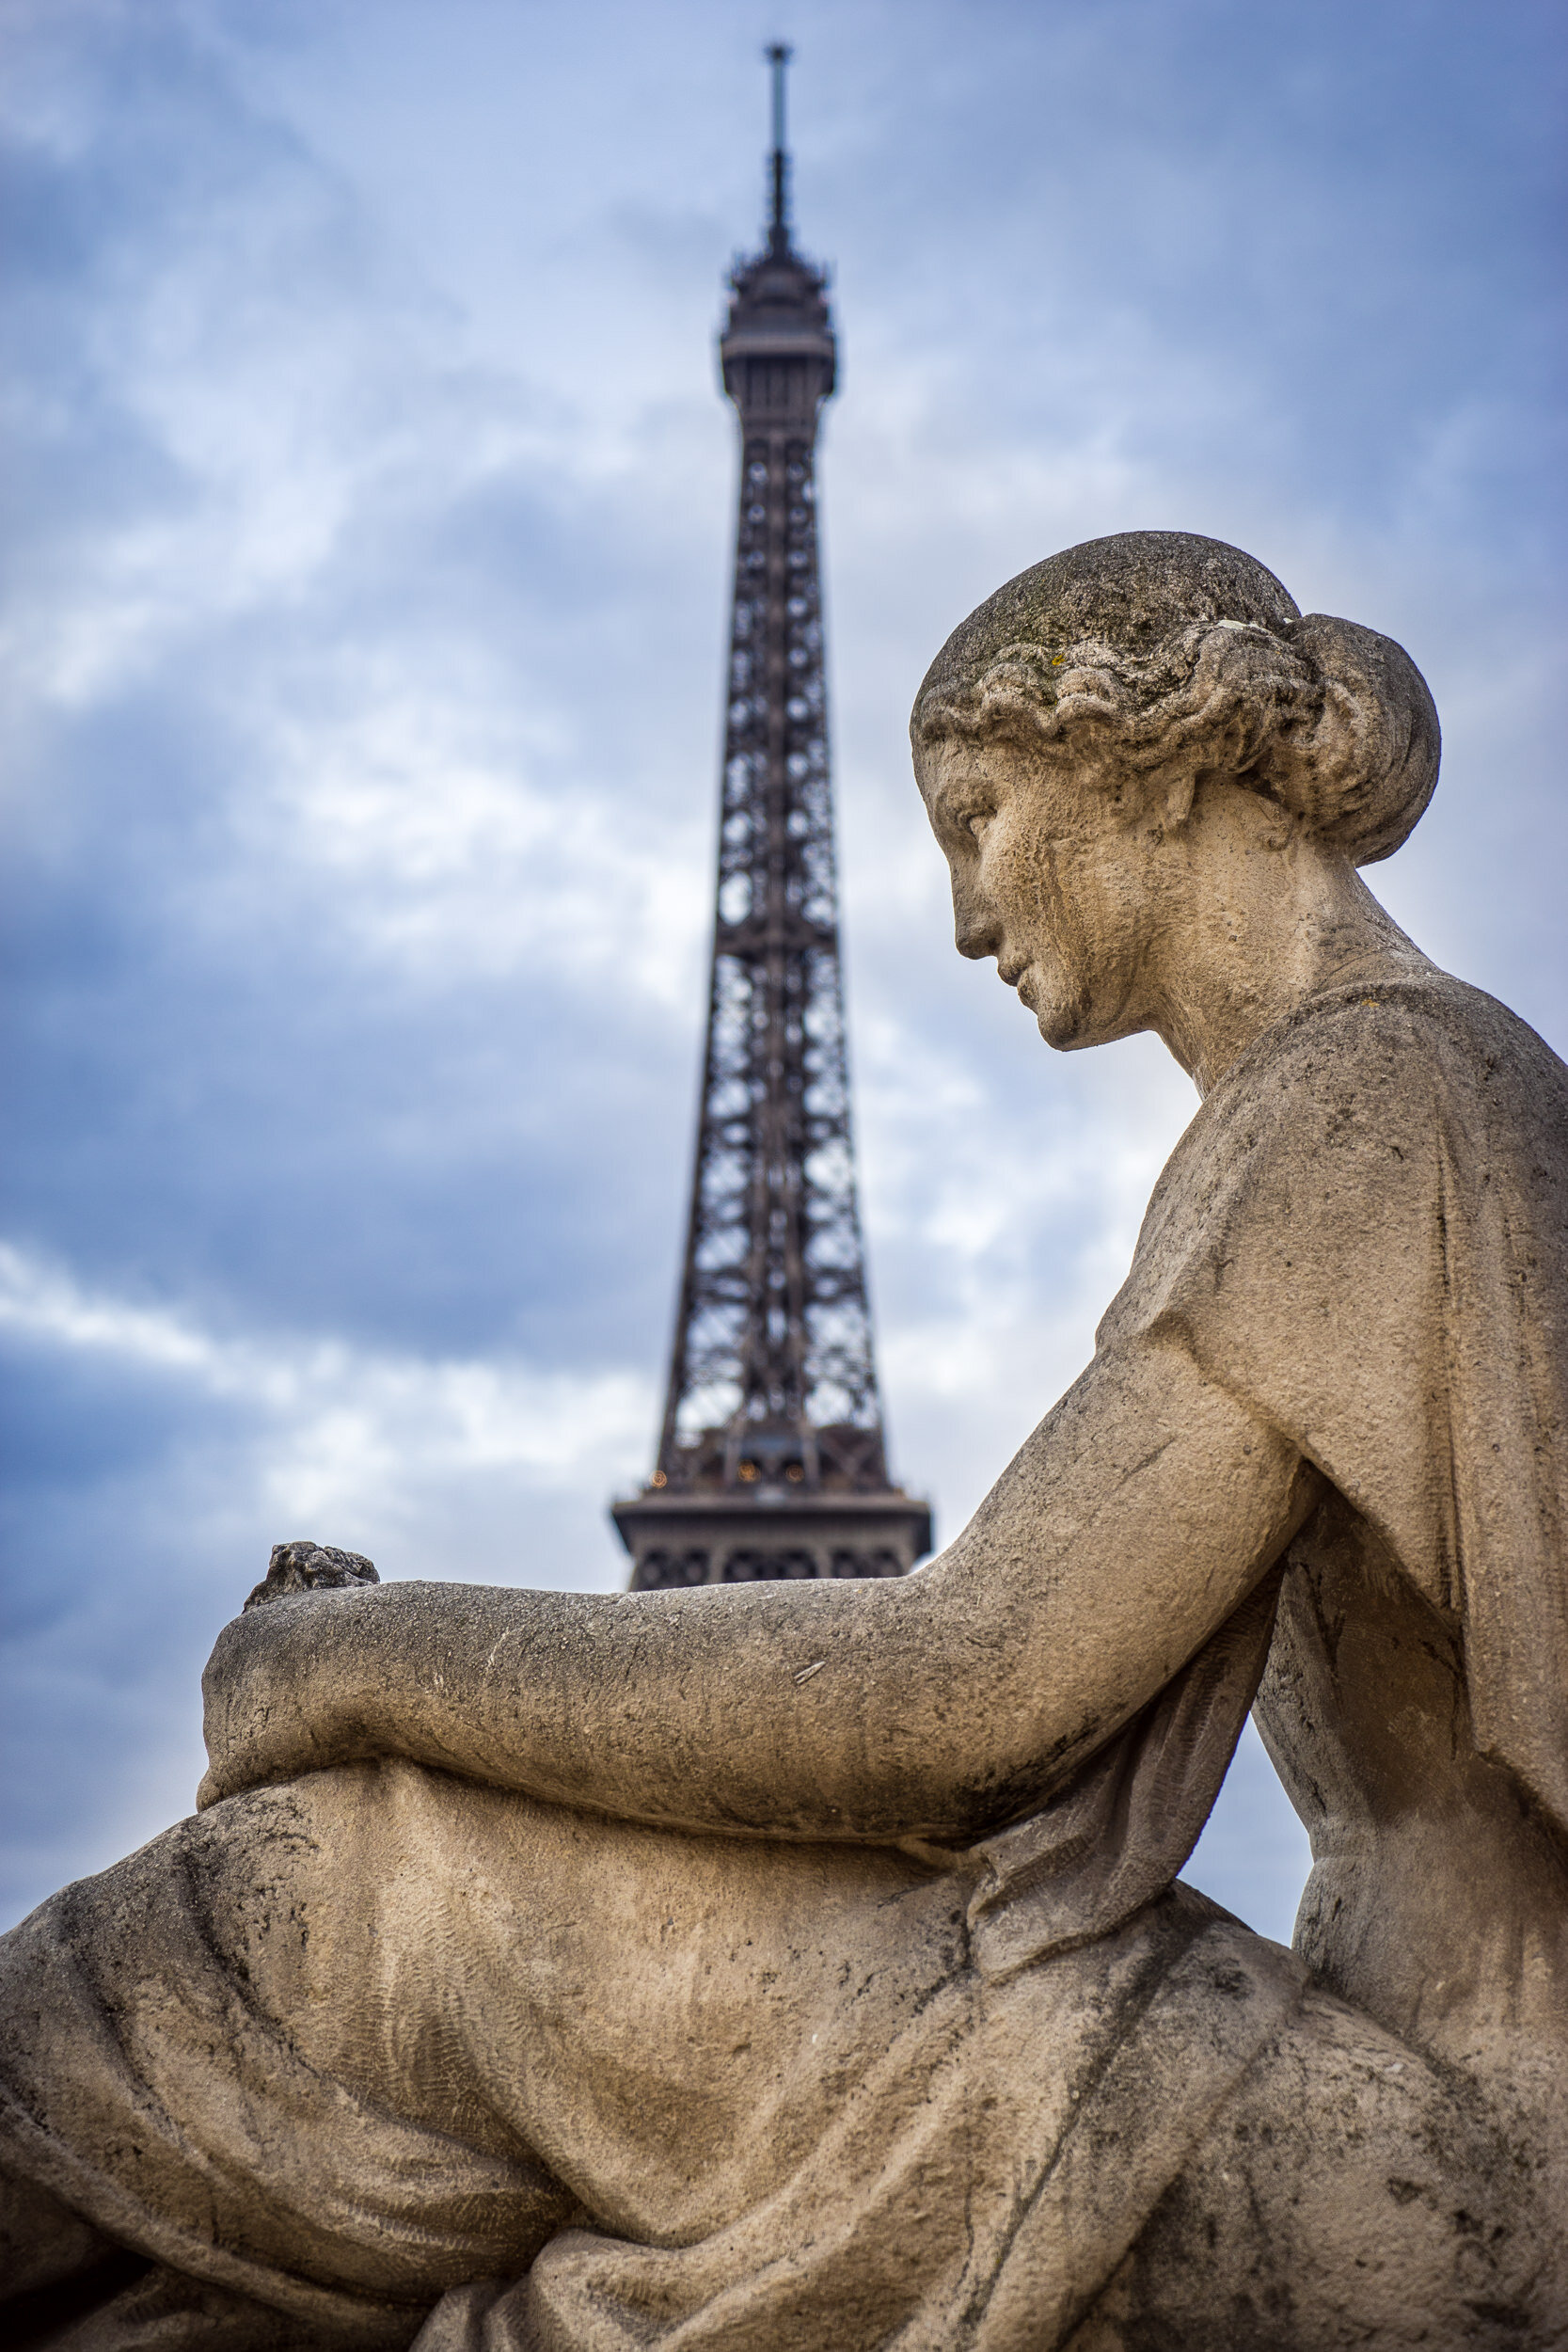
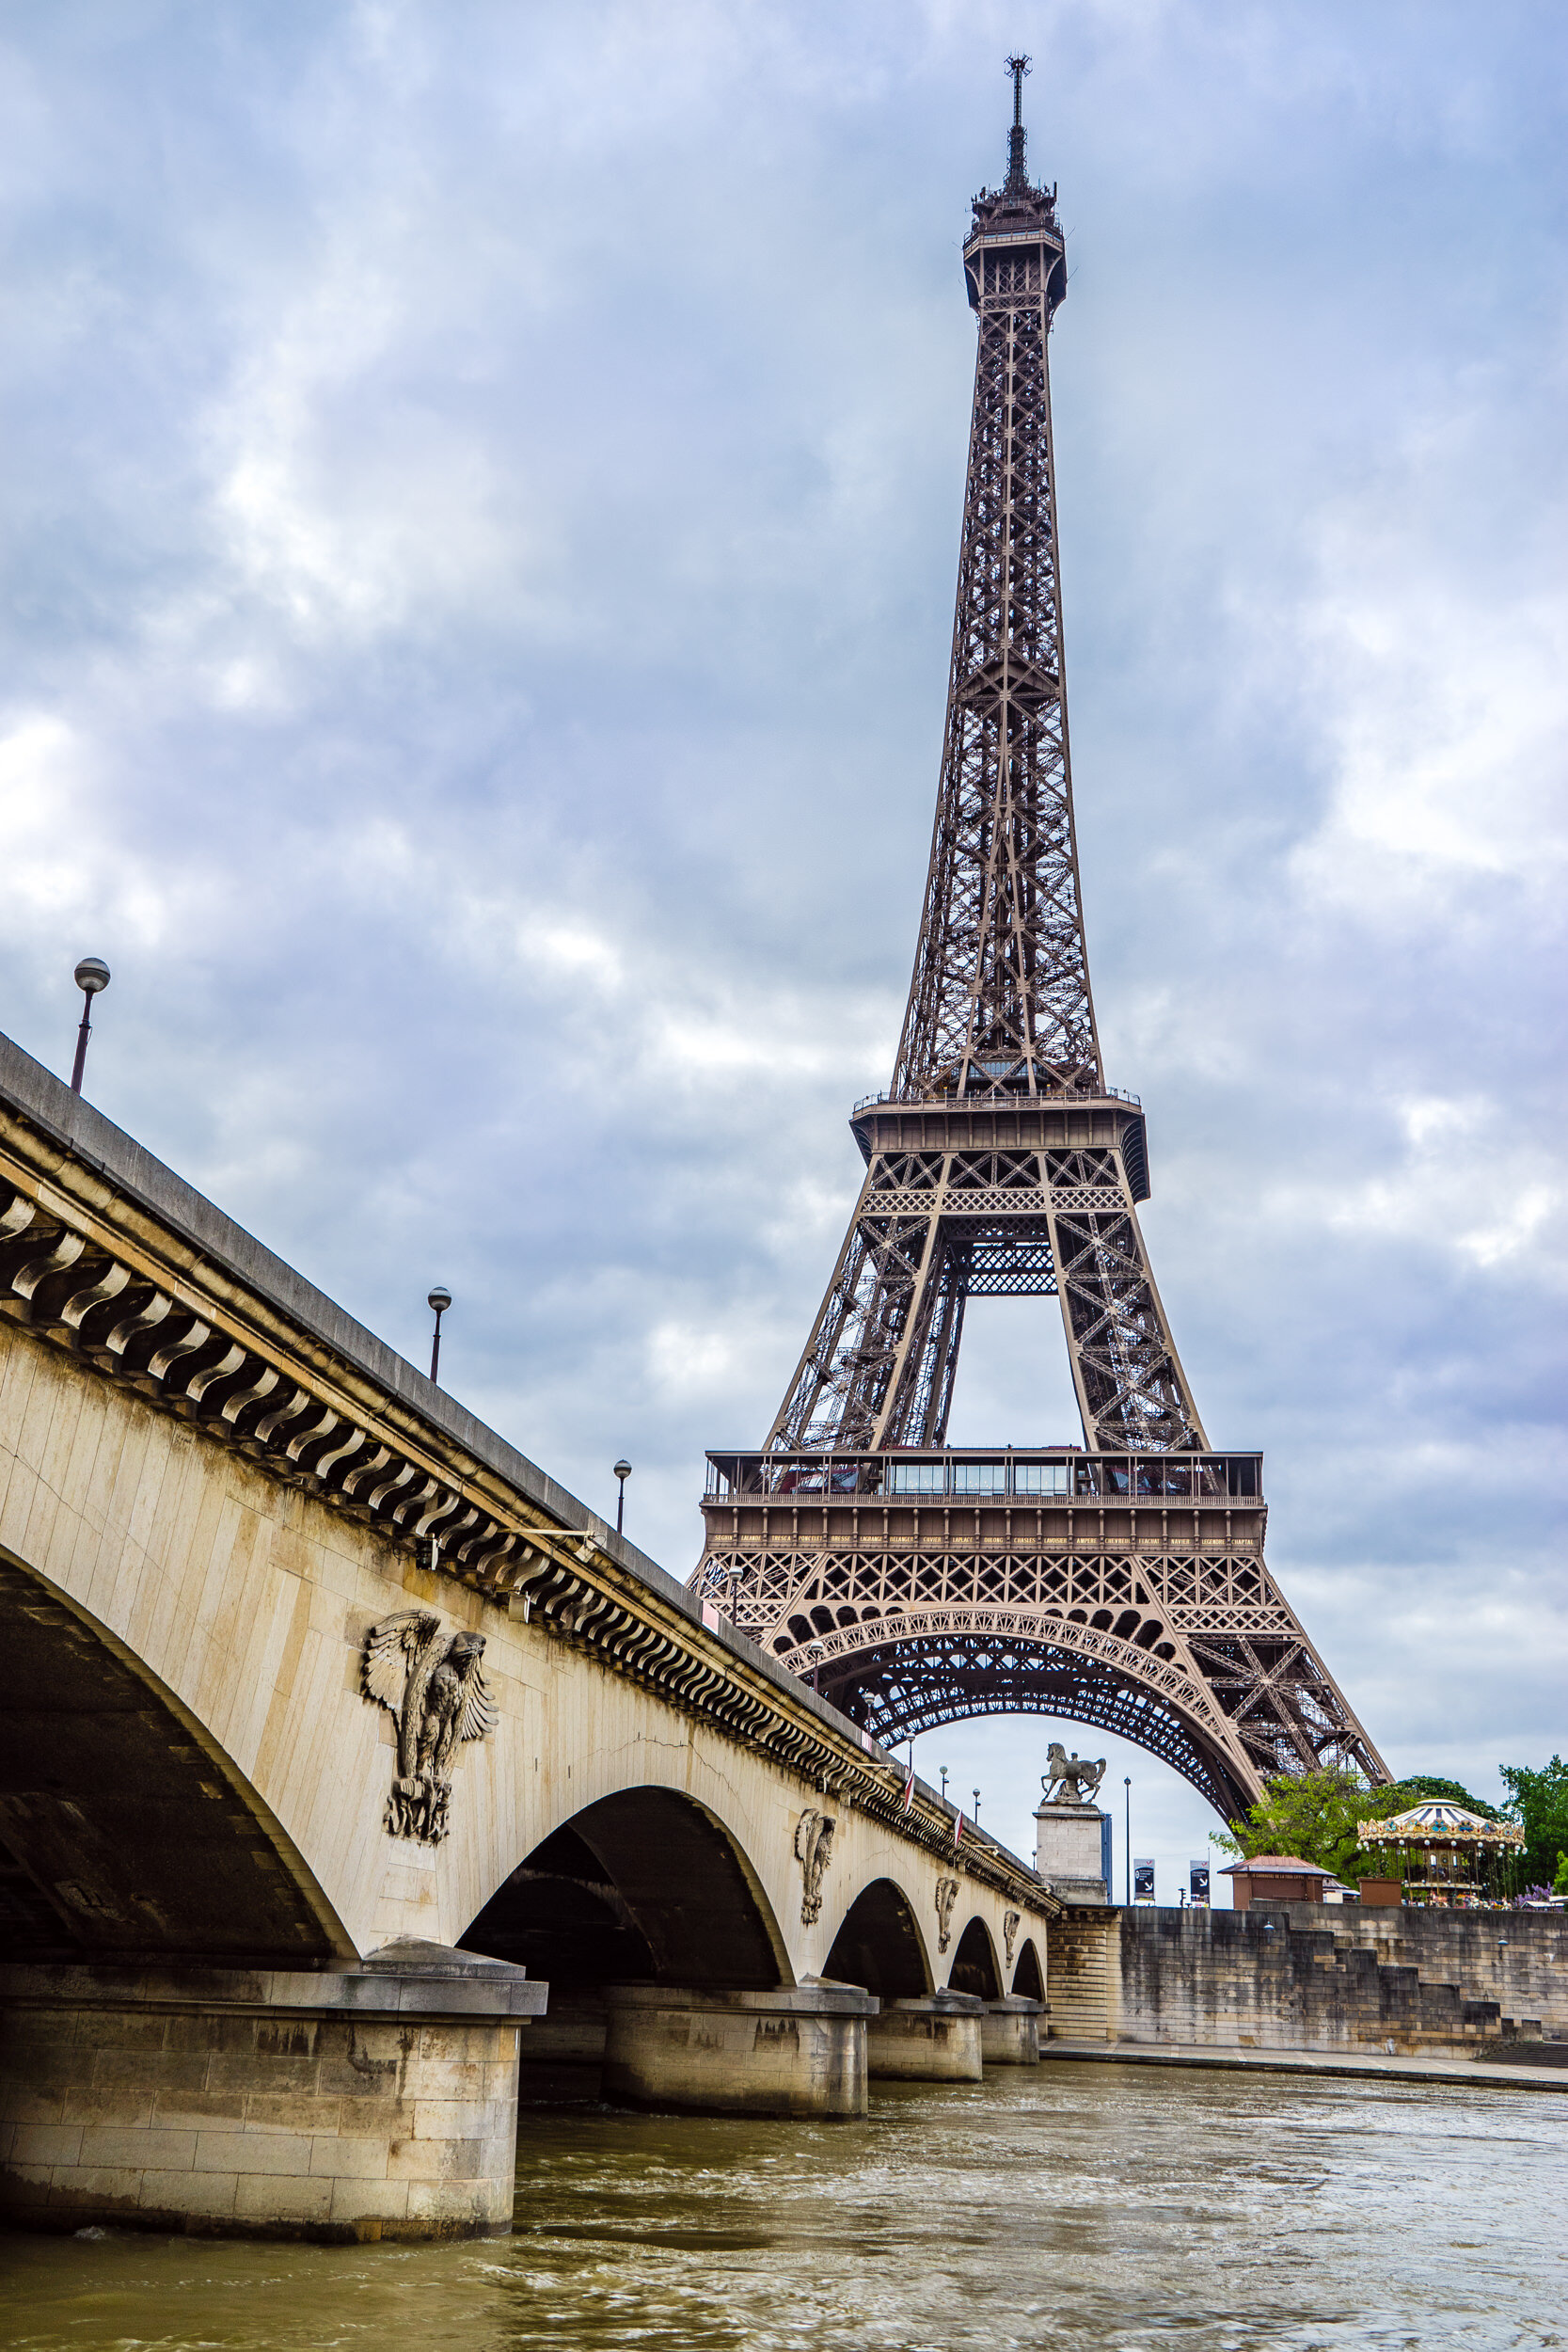
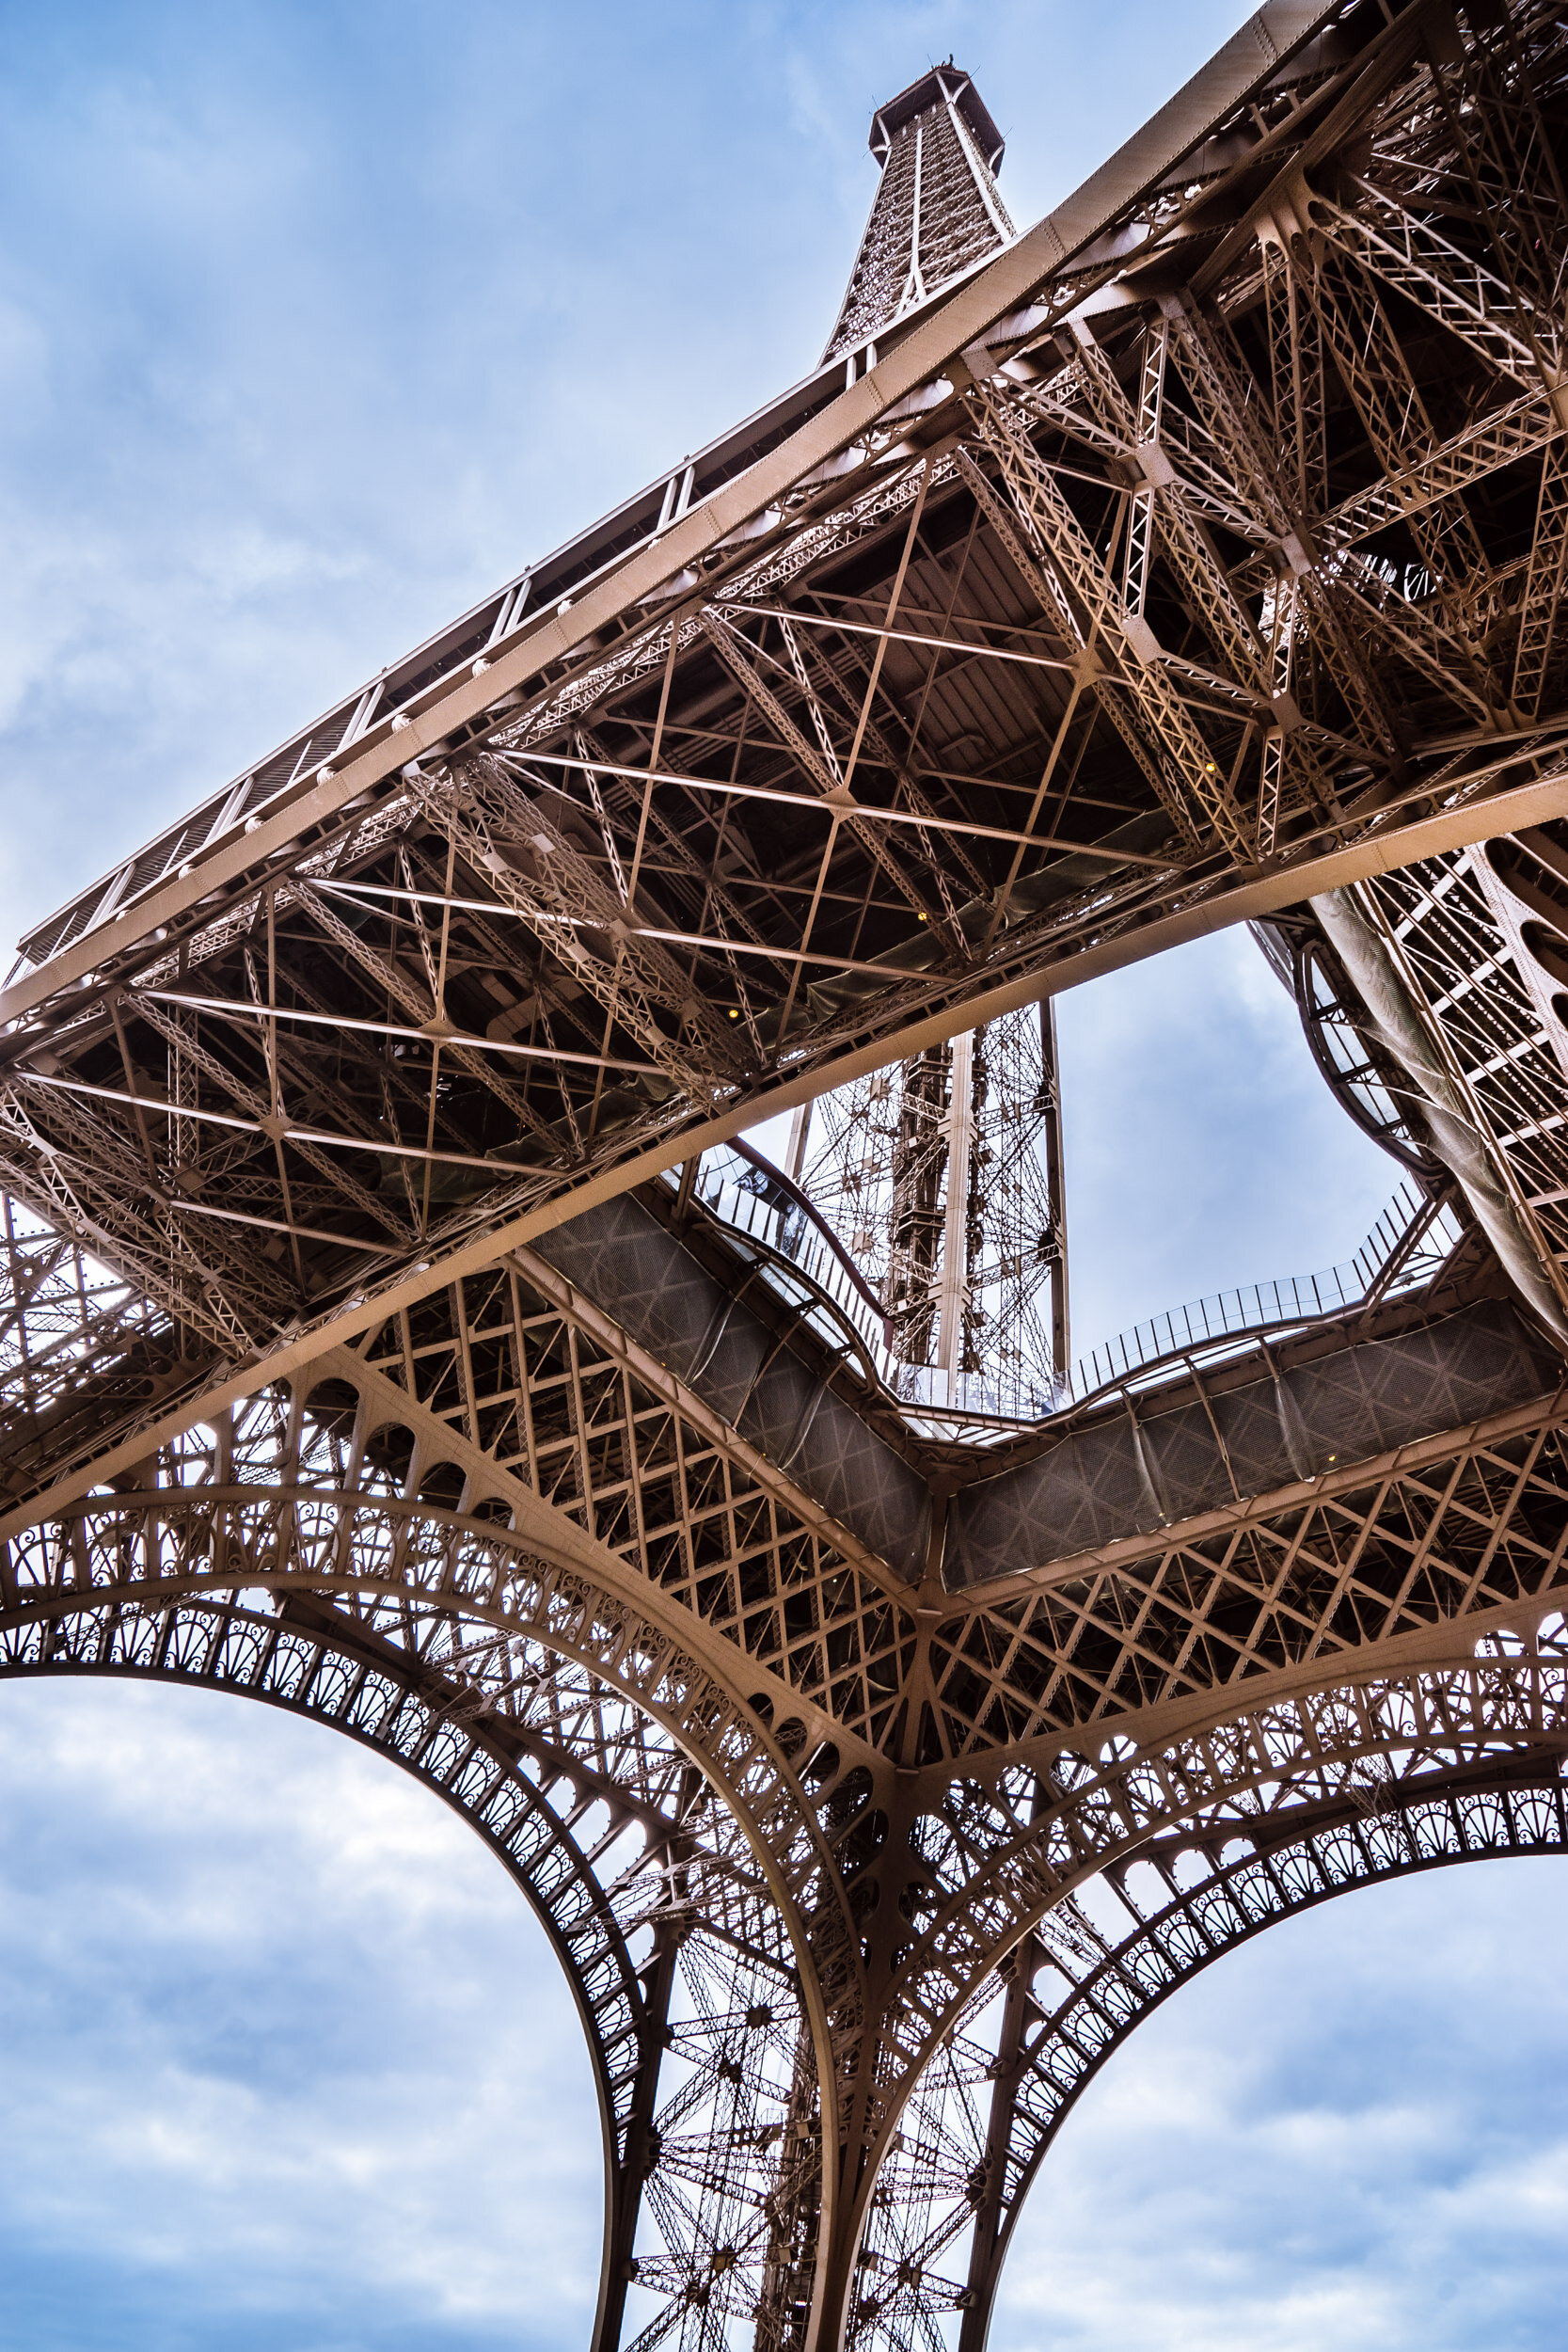
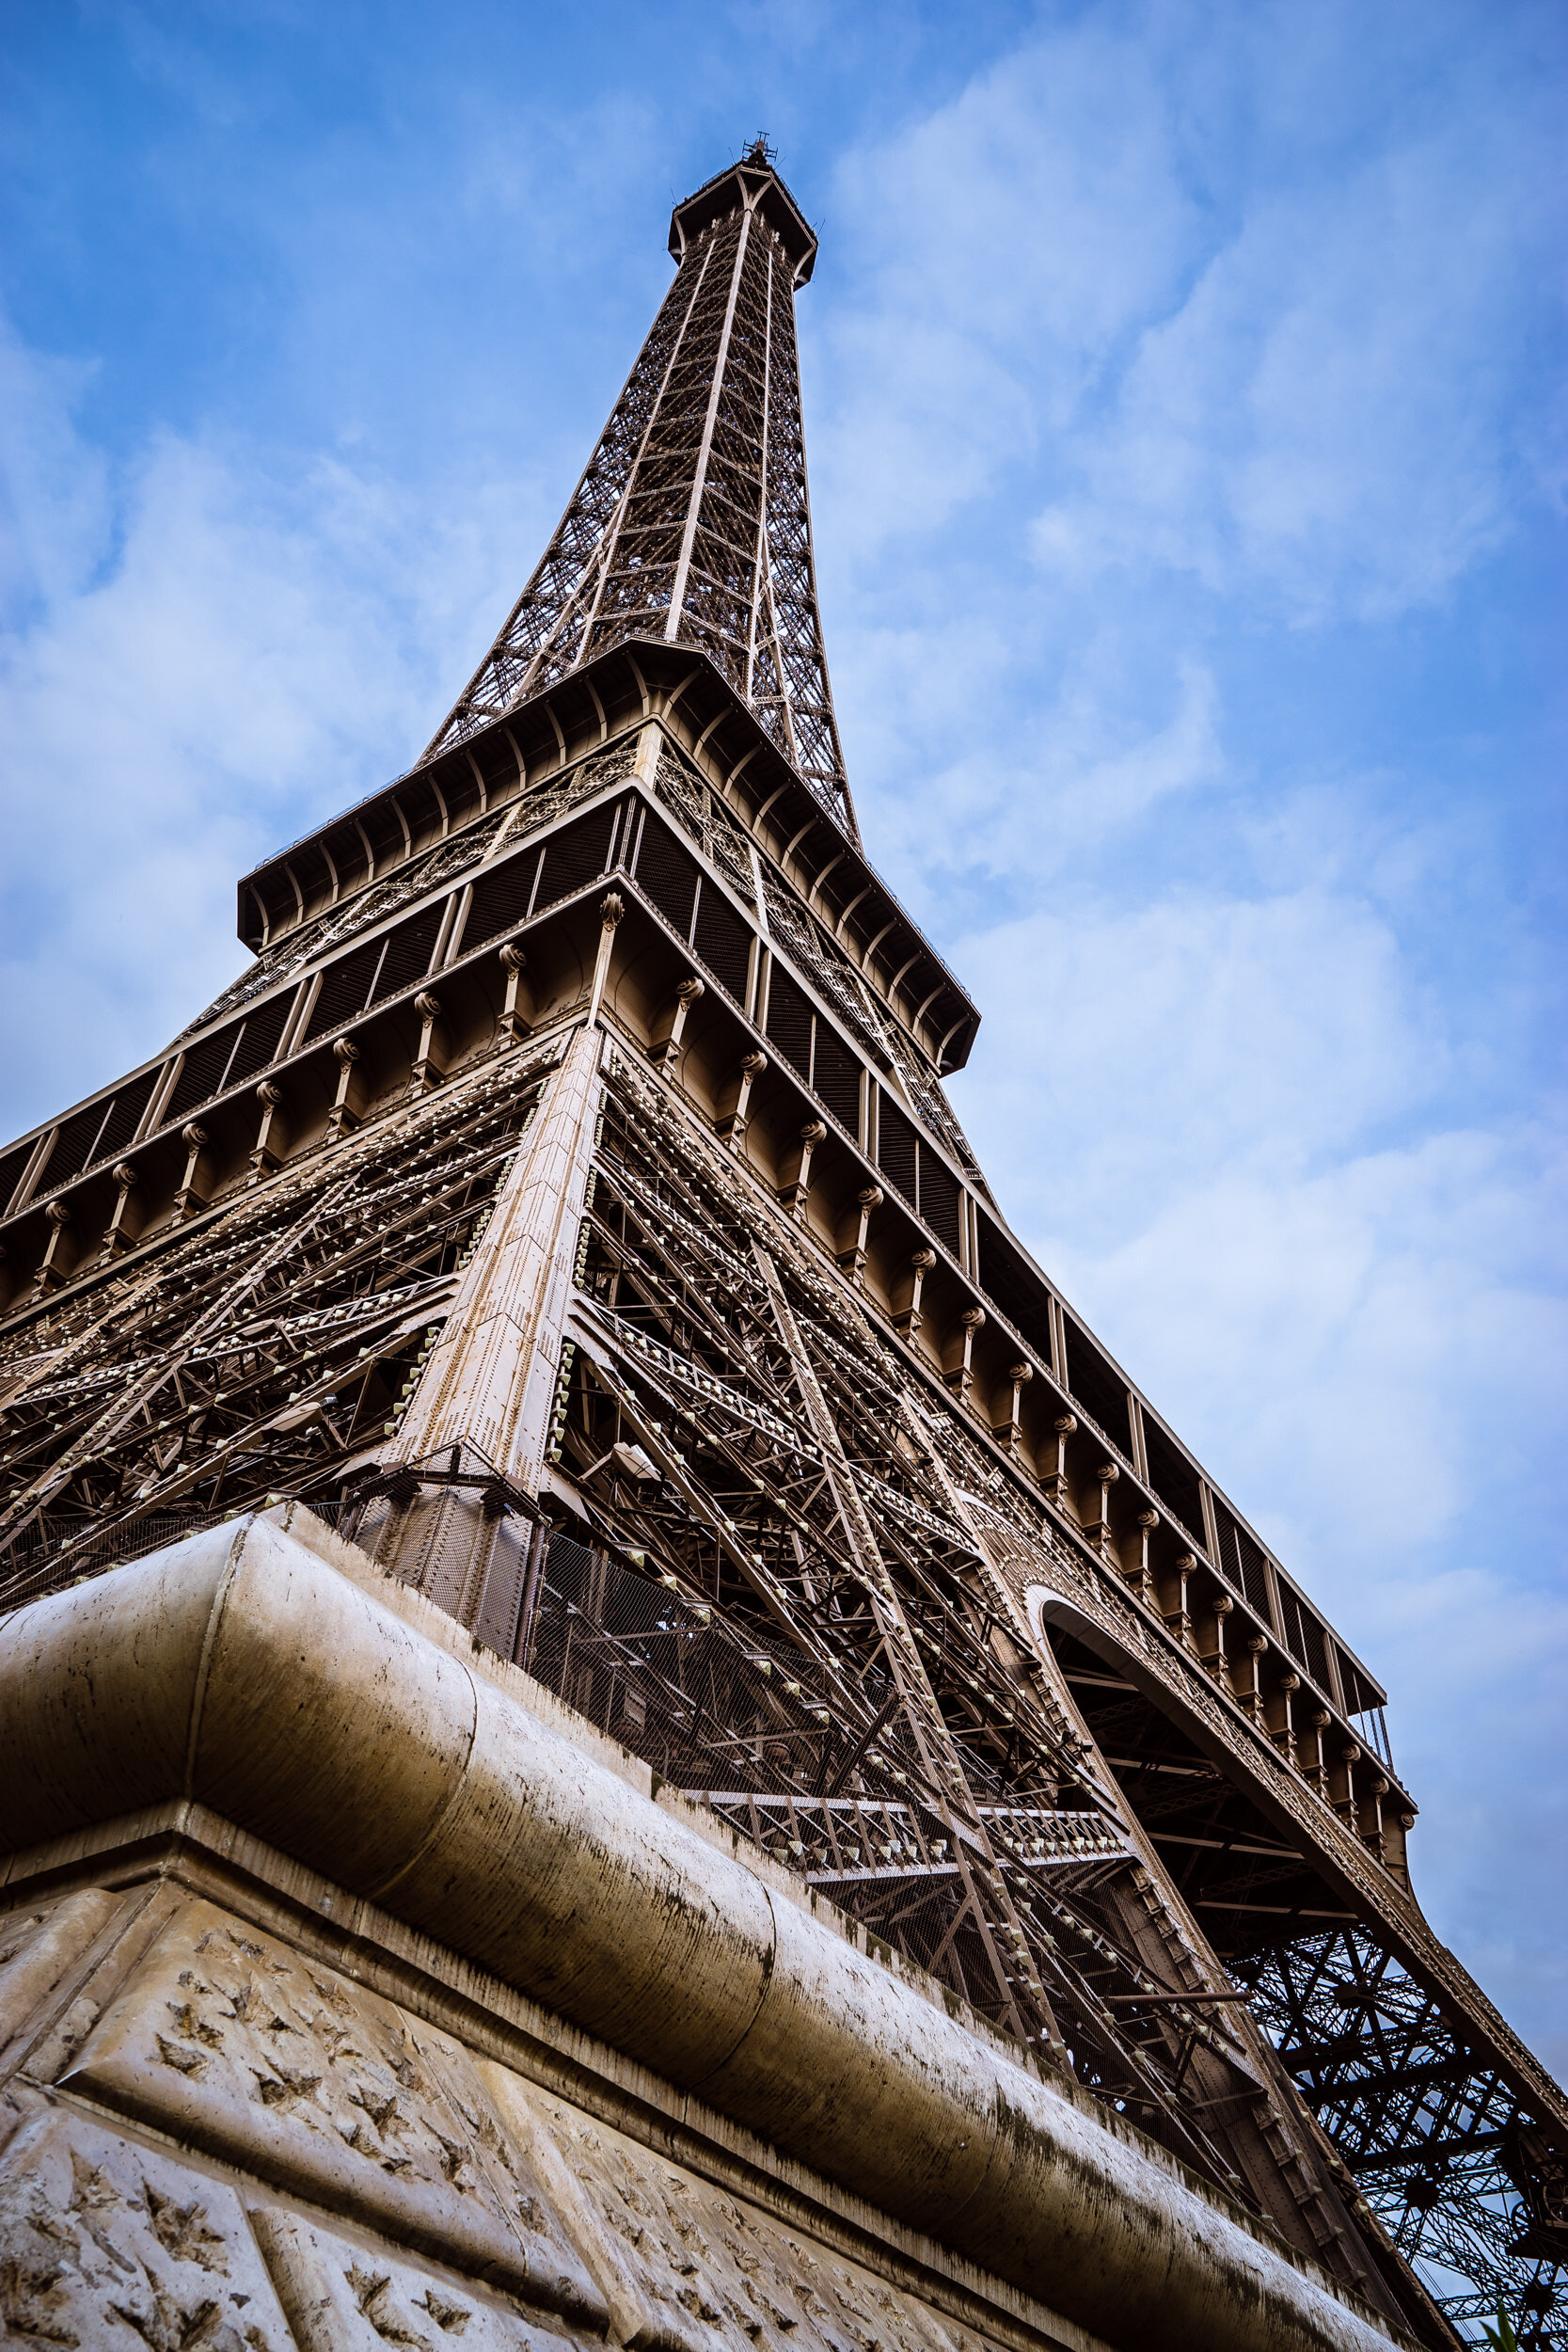
Now onto the last lesson I’ll tell you about from my Paris photos. When there is something you REALLY want a good or even fabulous photograph of, then photograph the heck out of it. Walk around it, lay on the ground, stand on a bench, look up, down, around it. Step back, take a breath and look at it again with new eyes. And photograph it again. And again. And again.
The more different kinds of photos you can take of that special structure, building, scene...the more likely that you’ll get “the one”. The one you want to frame, share, pat yourself on the back for taking.
Here are just SOME of the photos I took of the Eiffel Tower.

So let’s summarize - you know I love a good summary. Take some time, maybe this weekend, to dig out photos from a previous trip. If you can’t find your photos, that’s a whole other issue that we need to talk about. (maybe start here with this handy blog post)
When you look at the photos from your trip as a series, what do you notice? Do you notice that you have mostly wide-angle overview photos or almost all details? Then you need a better balance of the two.
If you notice the composition is off, or you don’t have many perspectives of each subject or scene, then let’s learn more about that. Here’s a good place to start.
Have you tried anything different or interesting with ANY of your photos? Then let’s bust out of that comfort zone next time!
And finally, do you have photos of people? If no, why not? And if yes, are they of the backs of heads or taken too quickly to really compose a good photo? If yes, then ask yourself if there’s something you can do better next time.
Really it’s about analyzing your results, and trying to figure out what worked, what didn’t, and what is missing. I know, sometimes that’s hard to do with our own photos. Which is why I offer 1:1 photo feedback sessions. If after going through this exercise you're coming up blank with how to improve your photos, check out my sessions right here.
And if you went through this exercise and learned SO much about your photos that you can’t wait to put it all into practice? I want to hear all about it! You can do that in the comments below, or by jumping into our Facebook group, PhotoFluent Travelers.