
Composition Tips for 6 Different Travel Scenarios
Last week we talked about a few camera settings recommendations for different travel situations, or subjects like people, food, architecture...If you missed that fabulous post, no worries...it’s right here.
And this week, I want to dive into a few composition recommendations for those same 6 scenarios. Because your camera settings are only a part of the story. A small but important part. Another part is how you compose the components you’re looking at.
Now if it’s a still life of fruit on your table that you’re photographing, you can change the composition by rearranging the fruit...using a different bowl. But when you travel? How much can you really change?
Well, a lot actually. And most of those changes happen with you. And your feet. Allow me to explain.

This photo I made in the comfort of my own home (well tiny apartment, but anyway…). So I had control over the composition - where I positioned each lovely model in relation to the light.
When taking in a scene, you notice the lighting is very harsh on your subject...how can you change it? Move your feet. Change your position, angle, perspective. If the subject is in the wrong place in your frame? Move to the right, left, up, down. I think you see where I’m going here.
YOU are the one factor that you can always control when composing your photos. And changing your position can affect the way the light hits the subject of your photo, and it can change where your subject is placed in your photo.
Let’s walk through these 6 scenarios, and I think it will start to make more sense.
Although I didn’t get the whole person in this photo, I was intentional about how much I included.
PEOPLE
The first tip I have here is not to cut off limbs or heads, unless it’s intentional. Okay, I don't mean intentionally cutting off heads like a serial killer. I mean intentionally cropping so that it doesn’t look like an accident that just a hand, or foot is left out.
Think about it as you’re setting up your photo. Do you want the whole person? Just the waist up? Maybe just a head shot is good. And keep an eye on the hands and feet. We don’t want to leave out the hand at the wrist...or the foot at the ankle. If you‘re going to leave it out, commit and leave out the whole or most of the arm, or leg.
Second tip: when you’re positioning the person in the frame, make sure there’s more space in front of, than behind the person. That way it doesn’t look like the person is going to run into the frame. I know the frame is not really there, it’s just in the photo. But it’s just more appealing to have that space. Trust me.

I did not include the entire person, but made sure to include the entire head and hand/arm. Also he was positioned on the left side of the frame, since he is facing to the right.
LANDSCAPES
First tip: try adding some layering to your scene, by including elements in the foreground, the midground, AND the background. So those scenes with the white peaked mountains that are so breathtaking? Yep even those, get some bushes, or rocks in the foreground too. It helps create depth and interest to the entire scene.
Second tip: Choose a subject, especially in a busy scene, and place it in your frame so that the viewer’s eye knows where to start when looking at your photo. As the photo creator, your goal is to create a path in the photo for the viewer’s eye to meander down.

For the layering here, I focused on the ruins in the foreground, and then I have the red-topped roofs in the mid-ground, and bay/mountains in the background.
FOOD
First tip: make sure that your “hero” (main subject) is obvious. You can do that with focus through a shallow depth of field, and also with placement within the frame. So as you’re thinking about that path through your photo, place your hero in a prominent spot where the viewer’s eye will land first, before wandering off to the rest of the photo.
Second tip: avoid distractions by checking the perimeter of your frame. If you see distracting objects, or people, or bright light? Then shift your position to better frame your subject. Or, if you have the option, maybe even shift your subject or distractions to create a more appealing scene. I mean we certainly don’t want a crumpled napkin ruining that perfect photo of Napolese pizza, do we??

The hero here is the Caprese Salad which was emphasized with a shallow depth of field (f/4) and placement in the front of the frame.
ARCHITECTURE
First tip: try some different perspectives and angles of the building. Look up, down, across. We generally walk up to a building and make a photo of the entire building. But take a moment to turn your head and move your body to see what other angles look interesting.
Second tip: make different views including the entire building AND close-up details of doors, windows, and other building features. Some of my favorite photos are of doors and windows. Why? No idea. But I love the details. Oh and shutters. I love shutters (real we-use-these-to-block-out-the-sun kind of shutters like they use in Europe, not the fake ones they stick to houses in the U.S).

Different angle/perspective of the Parliament building in London. I usually wander around trying to get as many different angles as my mind sees.
MUSEUMS
First tip: include museum patrons in your photos for context and storytelling. My first tendency used to be waiting for everyone to leave a scene before making the photo. Now I recognize the importance of including people in my photos. They are part of the story. They give context to what’s happening. Now I will sometimes wait until they move into a good spot, or do something interesting. Or if there’s someone wearing a very distracting shade of neon, I will wait for them to move on out of the photo. Don’t judge me. It’s distracting.
Second tip: make close-up photos of the art to emphasize the texture, color, and technique of the artist. I love to get as close as I’m allowed and get photos square to a painting, and then also across it to show the texture of the paint. To me it’s similar to standing really close to an Impressionist painting and then stepping back. It’s like two entirely different pieces of art.

Including other museum visitors in your photos add to the story. These visitors happen to be my sister and her “kids” (too old be be called kids anymore but won’t they always be to us??).
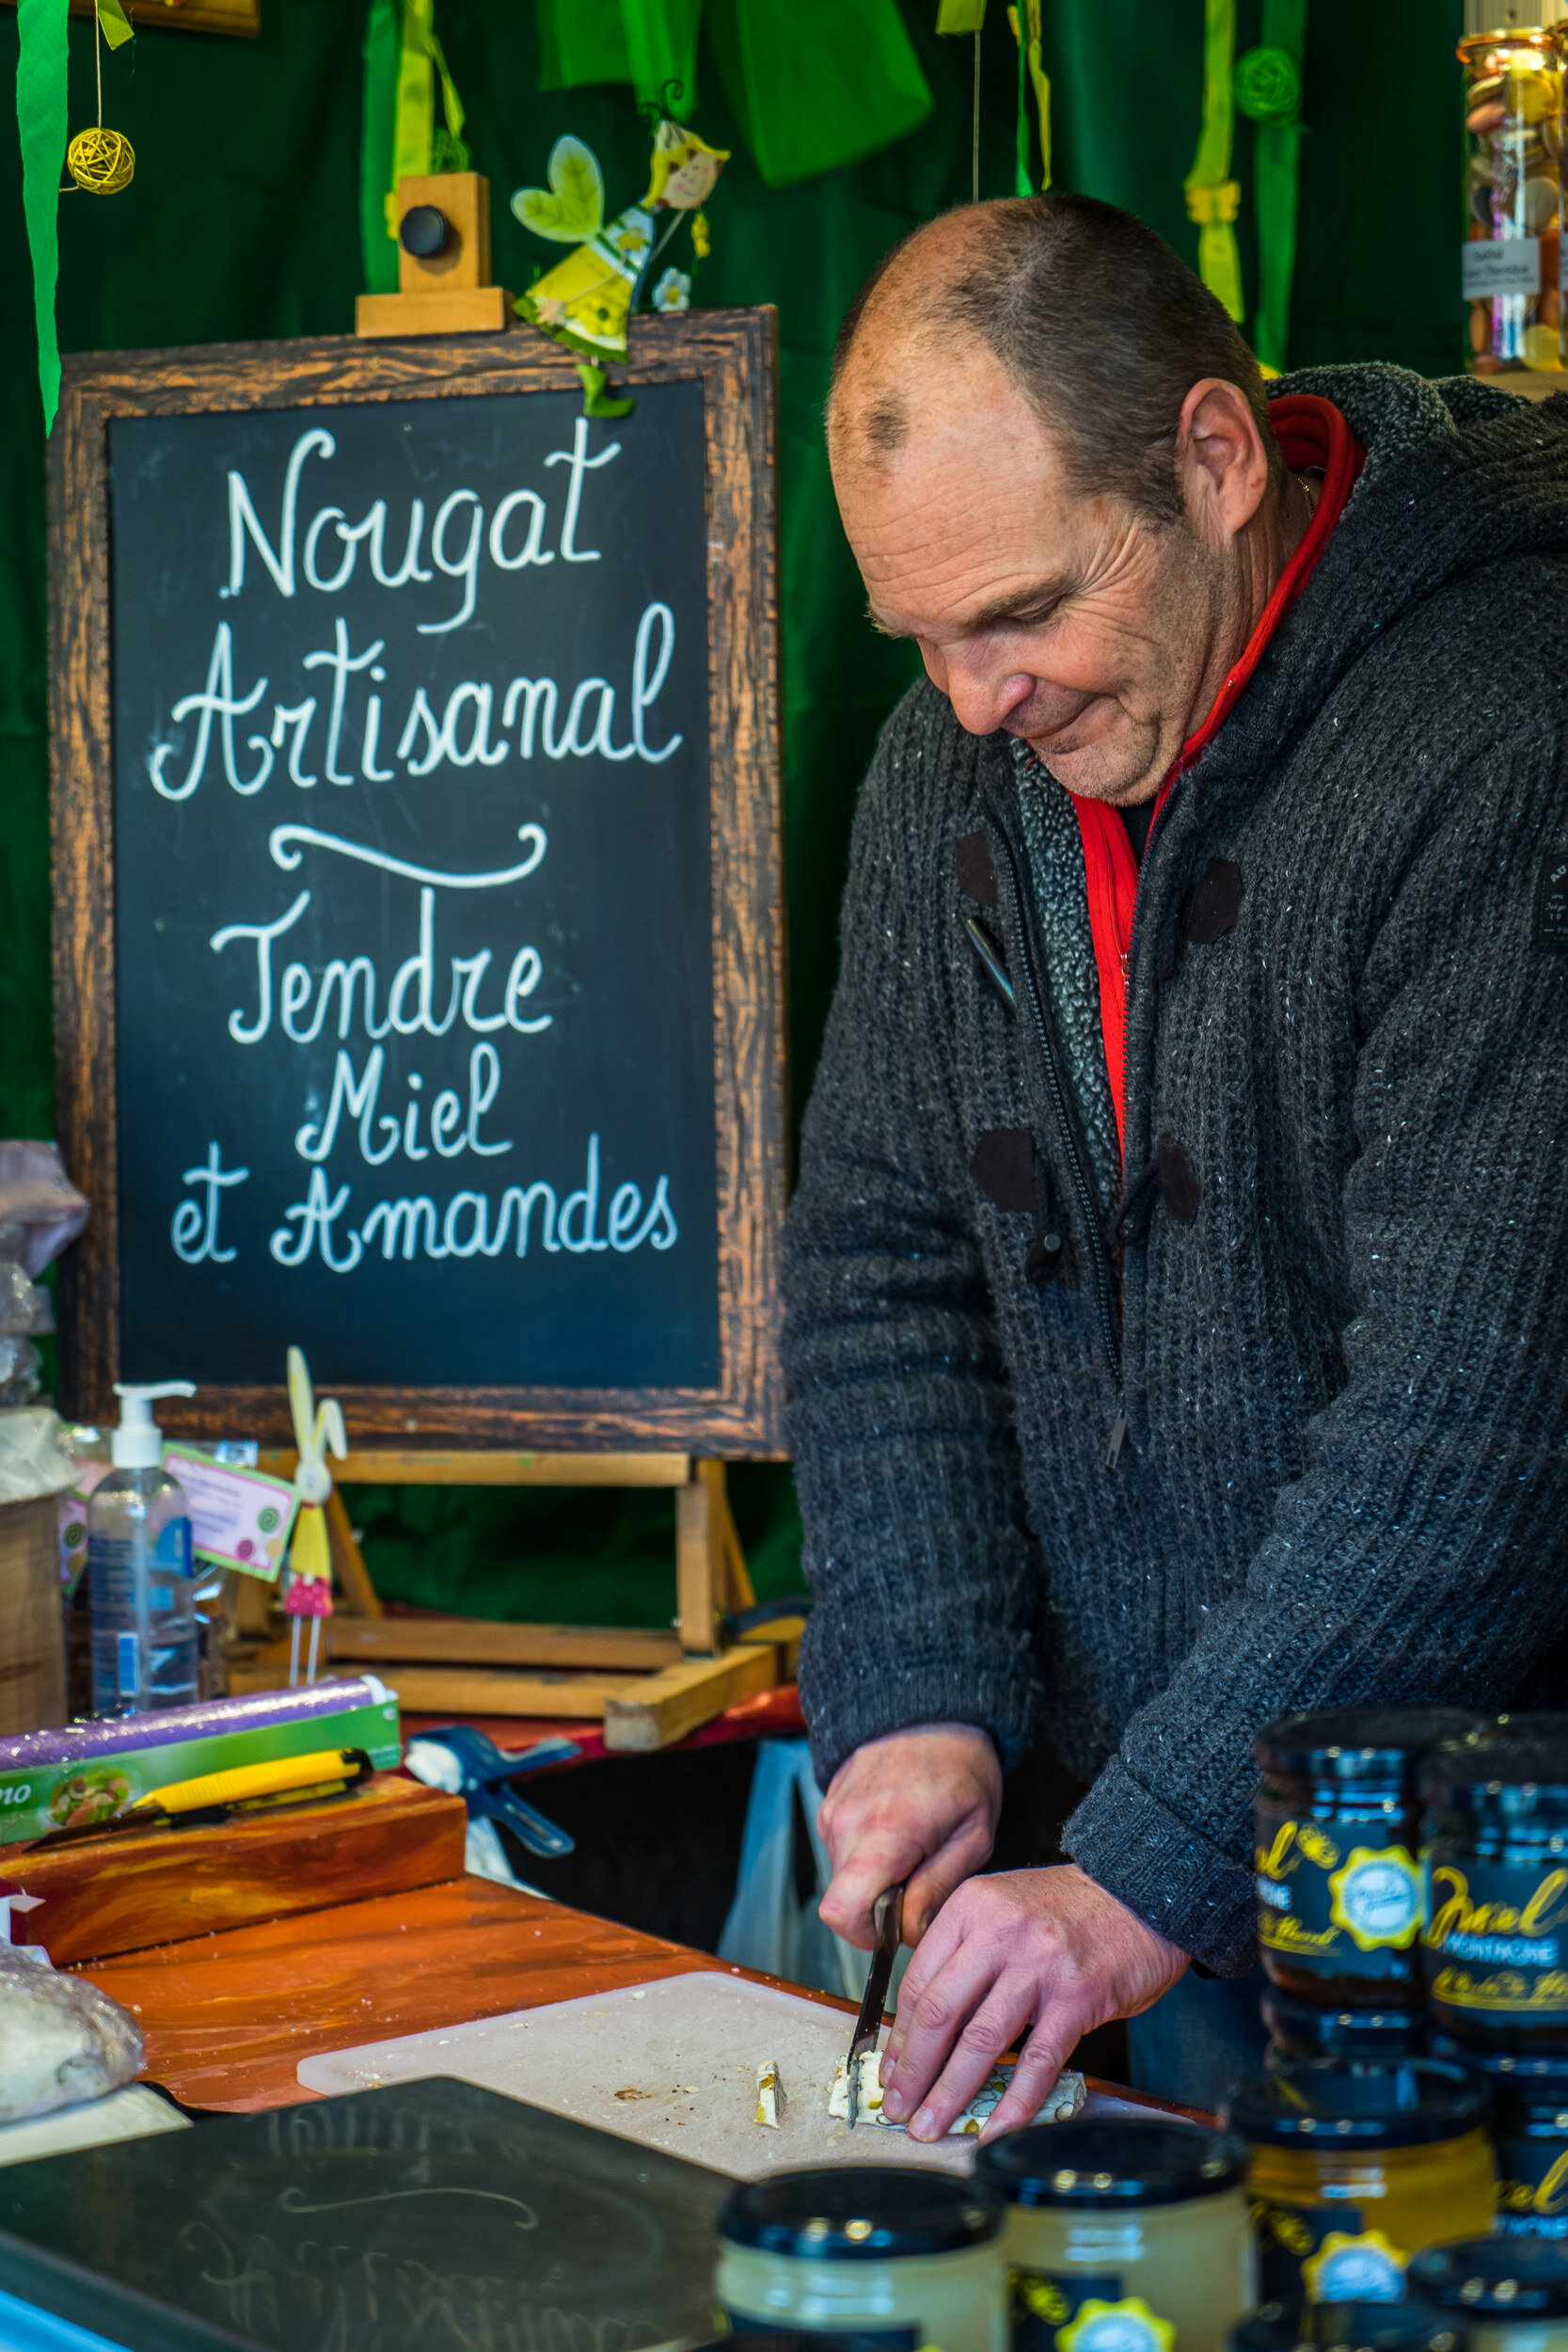
OUTDOOR MARKETS
First tip: to show the entire market perspective, remember to create a path for the viewer’s eye to travel down. And even though you want to show the entire market, you still need to have a subject, especially if the scene is very busy. If it's a busy scene, and you don’t give the viewer a little guidance by showing them a subject to start with, then they have no idea what to look at. Kind of like that pile of papers on your desk, and you just don’t even know where to start. Okay, I’m the only one who has that pile.
Second tip: In order to emphasize one particular subject, like the lady picking just the right tomato, you have a few options. First get close, and then use a shallow depth of field (aperture f/4). Also place the subject in your frame so it’s the first place your viewer’s eye lands. That way the viewer starts there, and then travels up to the photo to the rest of the market.

Even though there’s a lot going on here, I emphasized the subject (the cheese vendor) and created a “path” for the eye to follow. The viewer starts at the subject, and then wanders around to the cheese, and the shopper with her outstretched arm.
Now sometimes reading the words about a particular topic (like composition) isn’t enough to make sense of it all. I included some photos as examples, so hopefully that helps too.
But to really make sense out of all of this? Try them out. It doesn't have to be an outdoor market in Italy to give it a try. Just go to your local farmers market. No willing people around to practice on? Take a stroll and ask a neighbor. Or invite friends over for dinner. I mean how can they say no...you just gave them free dinner!
Because really you DON’T want to wait until you’re in Italy, or Portugal to give these a whirl. You want to have them down pat by then. For more tools and inspiration, make sure you grab the free Crazy Good Photos Starter Kit, get out your camera, and let me know how it goes!