
6 Things NOT To Do When Photographing Landscapes
Ahhh...a beautiful mountain sunset scene. What could go wrong? Well, if you’ve ever come back home with not so fantastic photos of gorgeous landscapes, then you know the answer. A lot. You might think that the scene is SO spectacular that a gorgeous photo is guaranteed. But not necessarily.
There are a few things to keep in mind to ensure a good photo. Even if the subject matter is a given. The easiest way to walk you through these tips is to tell you what NOT to do. So let’s jump on in there…
Don’t try to get everything in one photo
When you see a spectacular mountain scene it’s natural to want the ENTIRE scene in your photo. I mean you want to capture it all, right? Wrong. Because although your eyes can see it all, your neck turning helps out a lot. And your eyes are moving to take it all in. So when you try to get that same effect with your camera in just one photo? It doesn’t do the scene justice.
So sometimes (most times) you have to divide the scene up into parts to photograph. First take it all in, and really appreciate what you’re looking at. Then ask yourself, what is the first photo you want to make? What is your emphasis in the photo? If you can’t fit the entire mountain range in, then maybe a particular peak is the focus. If you can’t fit the entire coastline in, then maybe a particular portion of it is your emphasis. And maybe there is a particular focal point like a person, tree, or flower that can help guide you.
You can also think about dividing the scene up into chapters, like in a story. One chapter/photo is the reflection on the river. The next chapter photo is a closeup of the bridge. See where I’m going there?

Since I couldn’t possibly get the entire coastline in my photo, I opted for a portion, with the bird being a central focus.

And for another angle, I focused on the wave breaking on this rock. Same coastline, different aspect.
Don’t forget about the path for the viewer’s eye
Sometimes we get so excited about that amazing landscape that we just snap away. But then later when you look at it, your eyes don’t quite know where to go...what to look at first. When composing your photo, you want to think about the subject (even if it’s not completely obvious) and HOW you want your viewer to look at the scene. Where do you want them to start and then continue?
You can help with this “path” through your photo/scene, by paying attention to the subject, the lighting (our eyes tend to look at the lightest objects first), leading lines, etc.

To create a path for the viewer’s eye, I included the leading lines of the wall in the foreground, and positioned the subject (the cathedral) in a way that the eyes follow the lines of the wall, and then go through the park, and land on the cathedral.
Don’t blow out the sky while exposing for the darkest part of the scene
Remember to make sure you maintain the details in that sky, which is usually the brightest part of your scene. How do you do that? You might need to underexposure a bit to make it happen. But if you don’t, then the sky or brightest part of your photo will be super bright, the details lost, and it will really imbalance the overall photo.
By underexposing a bit, then you save the details in the highlights, and then later in editing you can bring out the details in the shadows.
It sounds complicated, but trust me it’s not! Here’s a whole blog post on those edits if you’re so inclined.

To make sure I didn’t blow out these highlights in the sky, I underexposed the whole image, and then brought out some details in the shadows in editing.
Don’t forget about the foreground
It’s kind of easy to focus on the mountains or ocean or cathedral when you’re looking at a landscape view...because that is the most spectacular part of the scene. But in order to make that most spectacular subject even more spectacular, sometimes a little layering and lead up is in order.
Think about the grand Alpine lake that you see before you. Amazing, right? But where do you even start? How do you capture ALL of that beauty? Well one option is to step back and include a foreground element, like I did here in Annecy with the tree, and the stone wall. That way, your eye has a place to start, and then it meanders back to the lake, and then the mountains in the background.
This way your photo has a little more depth and interest, than just taking a photo of the lake or the mountains. And who doesn’t want more depth and interest in their photos??

This photo made in Annecy, France is an example of layering: the tree and rock wall in the foreground, lake in the mid-ground, and mountains in the background.
Don’t forget about depth of field
Usually for a landscape photo, you’re looking for a deep depth of field, which means a lot or most of the scene will be in focus. Because generally with a landscape you are getting a LOT of things in the scene, and likely want them all in focus.
Let’s go back to our Alpine lake scene. You have a tree in the foreground, a lake in the midground, and then the mountains in the background. And darn it you want ALL of them in focus! Which can be done.
How you do that, is to choose an aperture of f/18, f/20, or even f/22. Now one thing to keep in mind is that a large aperture number also means a really small hole in your lens. If you just said “so what” well, I’m about to tell you…

This photo is another example of layering, with the trees in the foreground, town and bridge in the mid-ground and another bridge and sky in the background. And they’re all in focus with a deep depth of field.
Don’t forget to make sure the shutter speed is fast enough
A small hole in your lens for an aperture of f/22 means not much light getting into your camera. And your camera needs a minimum amount of light to make the photo. So to get more light, you might end up with a really slow shutter speed. Which is OK if you have a tripod.
If you don’t? Then consider lowering your aperture to say f/11 or f/8. If you need even more light (as evidenced by a ridiculously slow shutter speed) then increase your ISO. If all of this sounds like I’m speaking Russian, then check out this blog post to help clear things up a little bit.
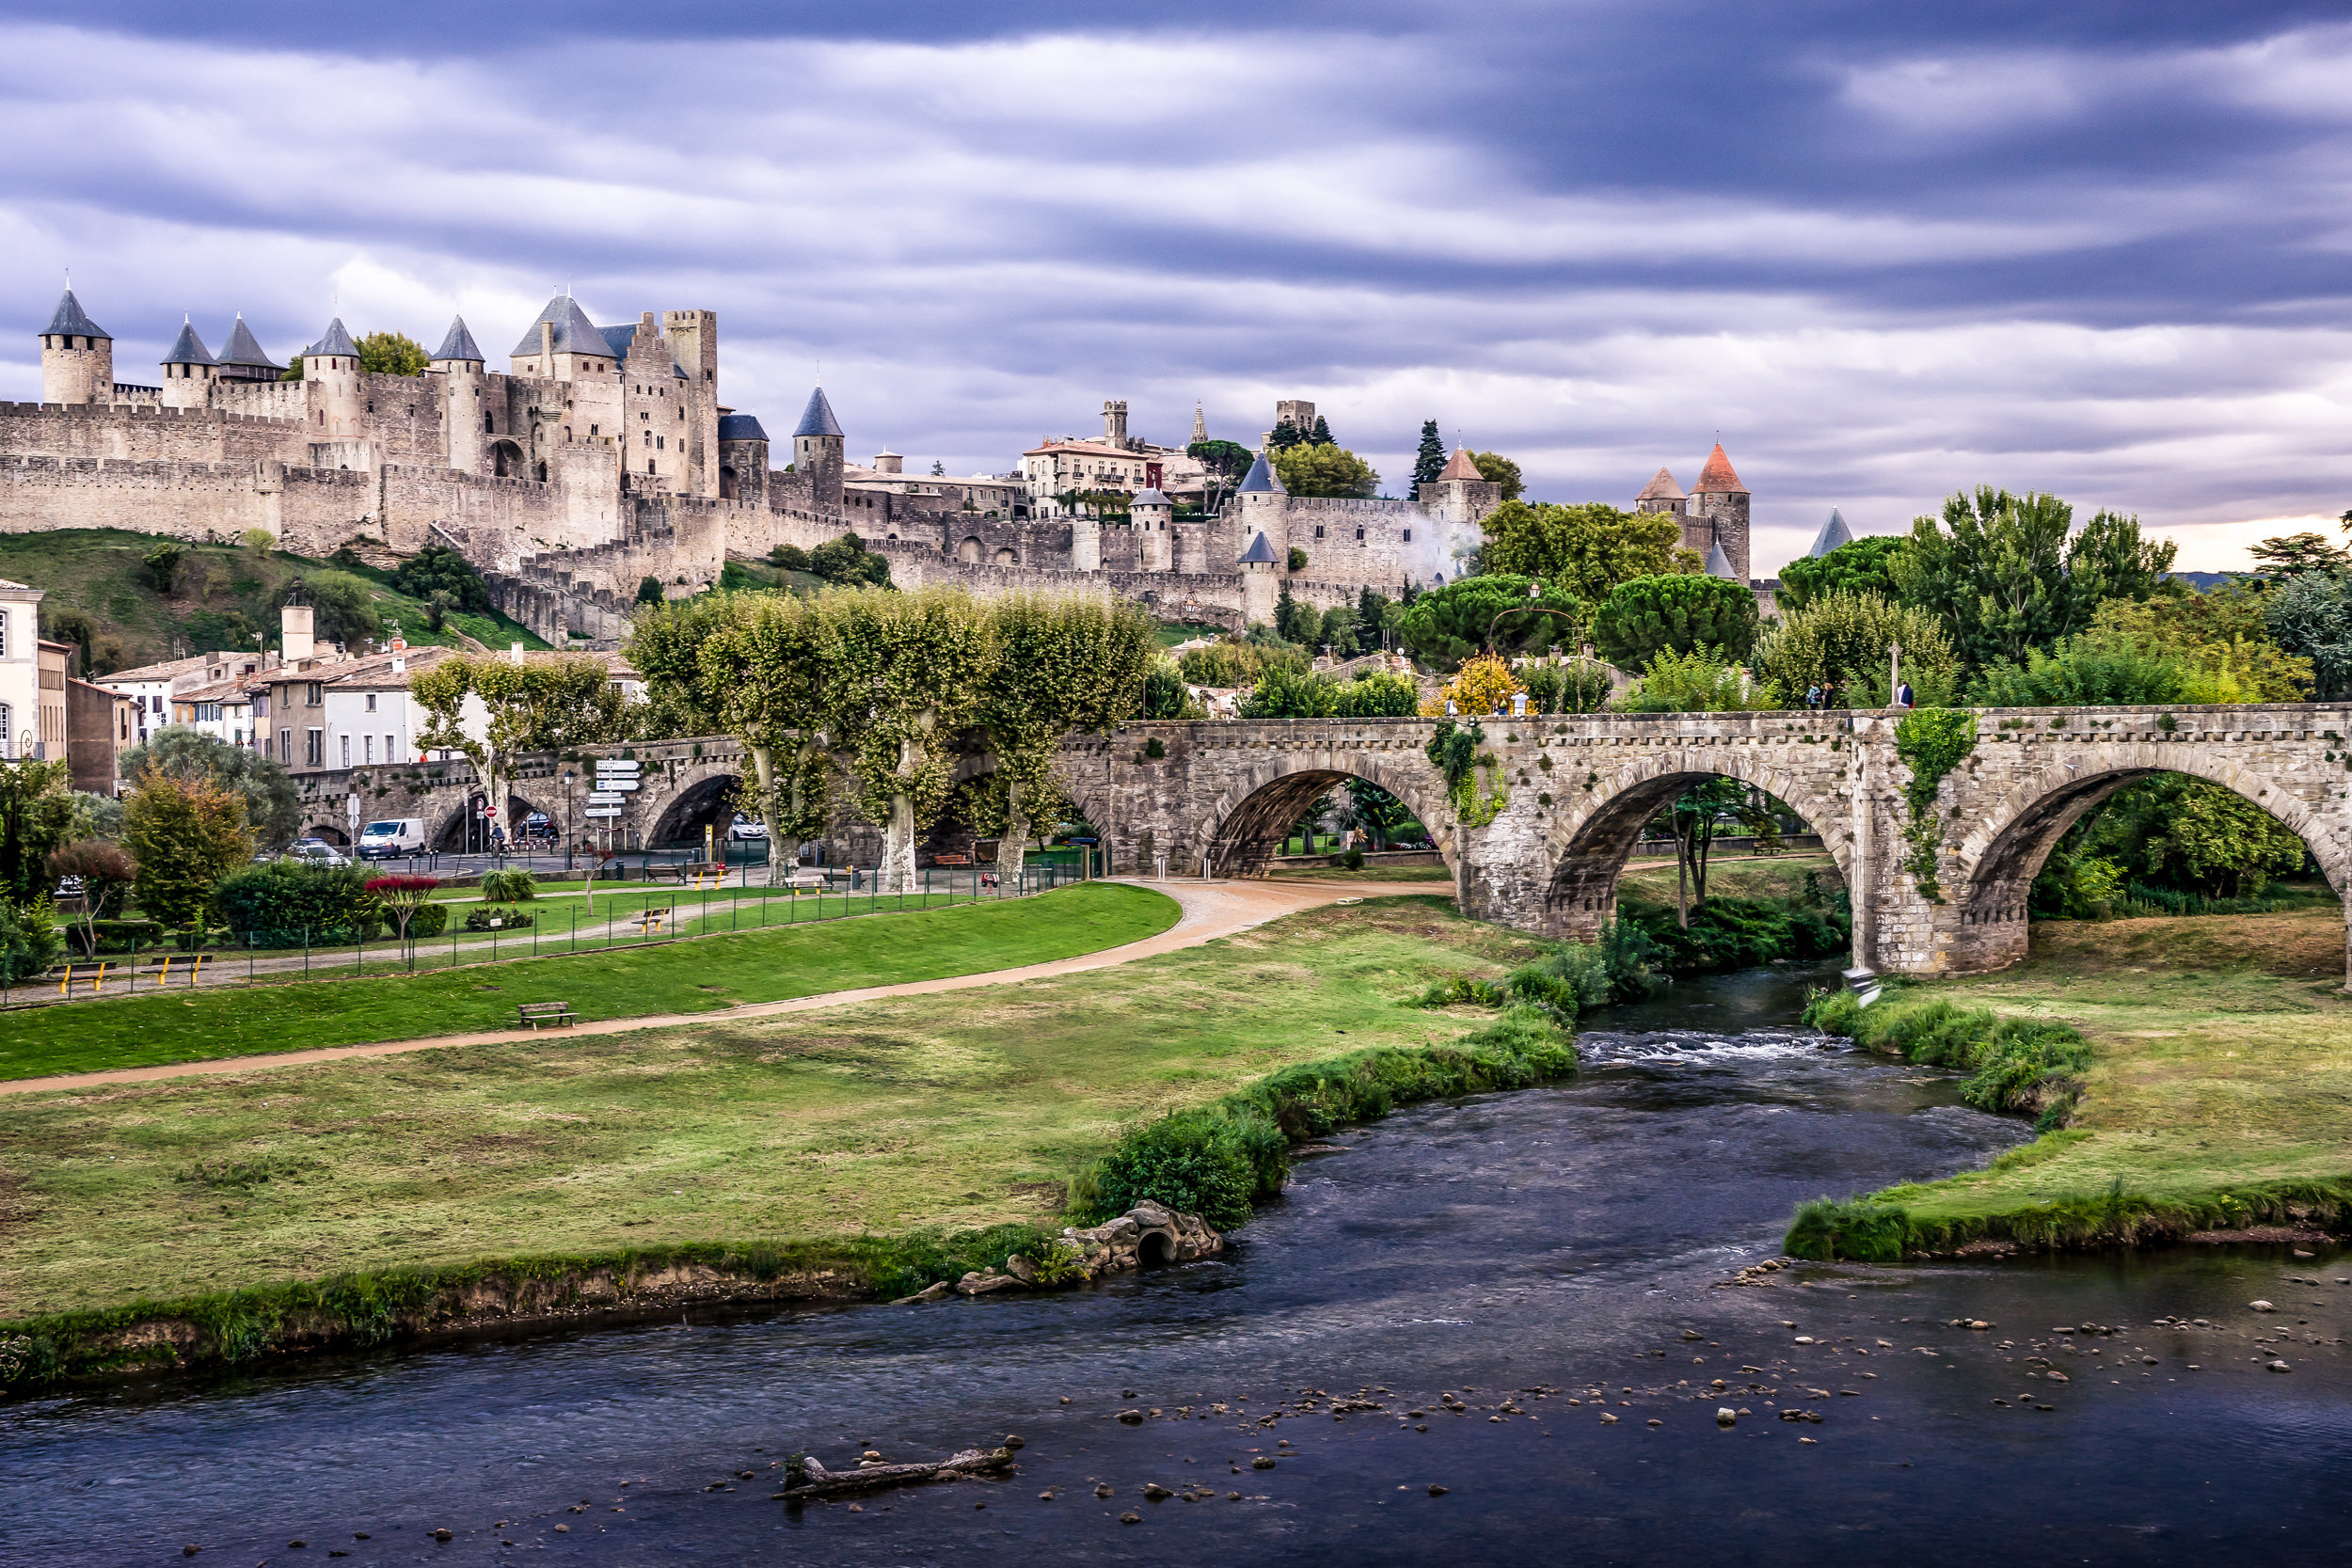
The sun was going down and it was a cloudy evening here in Carcassonne, France. So although my original thought was f/20 or f/22 since I wanted the river, grass and city all in focus, I ended up with f/8 to make sure my shutter speed was fast enough since I didn’t have a tripod with me. And still I get a pretty deep depth of field.
And there you go. You are now ready to create fantastic, jaw-dropping landscape photos. Oh wait, we can’t travel right now. Well that doesn’t have to stop you!! Get out there in your local area and try out these new skills.
You surely have SOME sort of landscape around you somewhere! Maybe a river, a farm, mountains, a lake, how about a cityscape? This is the perfect time to hone your travel photo skills, so that when you get back on that airplane and head somewhere fabulous, you are good and ready.
If you’re struggling a bit with the camera settings part of all of this, I have an option for you. Head on over to my training, Camera Settings For The Not-So-Tech-Savvy Traveler. It will give you the basics that you need to really start getting creative and master those landscape photos!